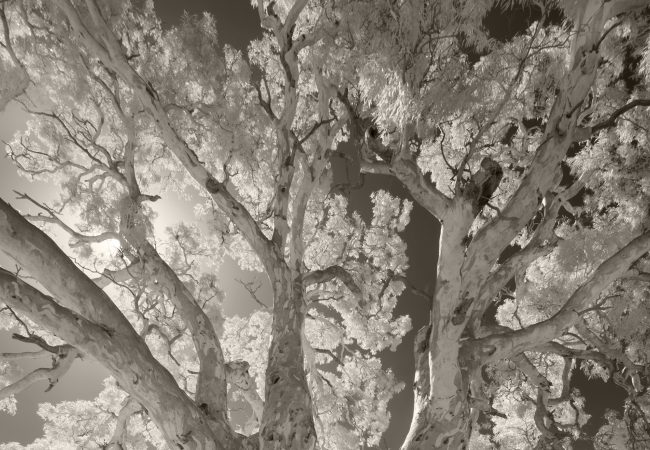
Danielle Edwards won this year’s Mike Ware Award at annual…
Darkroom – Alex Bond
Perth photographer Alex Bond talks about his darkroom.
My current darkroom I have had for nearly 20 years. It is a fairly simple affair, I have no running water or plumbing. It’s a work in progress, and it seems to work fine for me.
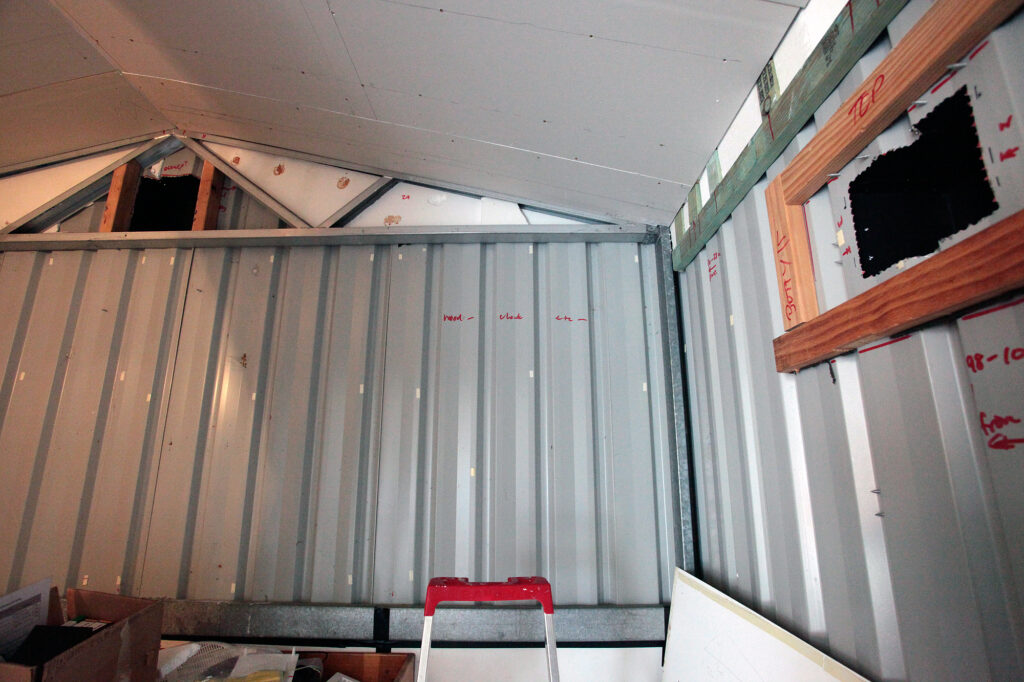
Tucked away at one end of my garden shed is a 2 metre by 4 metre darkroom. I made a wooden frame within my colorbond shed to form the framework for internal walls lined with gyprock plaster. The remainder of my shed, which I have also lined with plasterboard is general workshop space.

For ventilation, I cut two holes through the shed wall. Above my wet bench, I have an exhaust fan removing air from the darkroom, through a customised light baffle, to the exterior of the shed. Likewise, I have made another custom light baffle that allows fresh air from outside the shed to enter into the darkroom.
Access to my darkroom is via a double door, made from two single wooden doors. The larger door opens into the darkroom and is usually latched closed. A narrower, second door, the main door I use for entering and exiting the darkroom, opens outwards from the darkroom.
This serves a dual purpose. First, anything propped up against the outside of the doors when the darkroom is in use cannot accidentally trap you inside the darkroom, as the larger door can swing open into the darkroom. The other advantage is access to larger-sized items, such as my 3 metre-long darkroom bench, or my 4×5 enlarger, which can easily be moved in or out of the darkroom with both doors open.
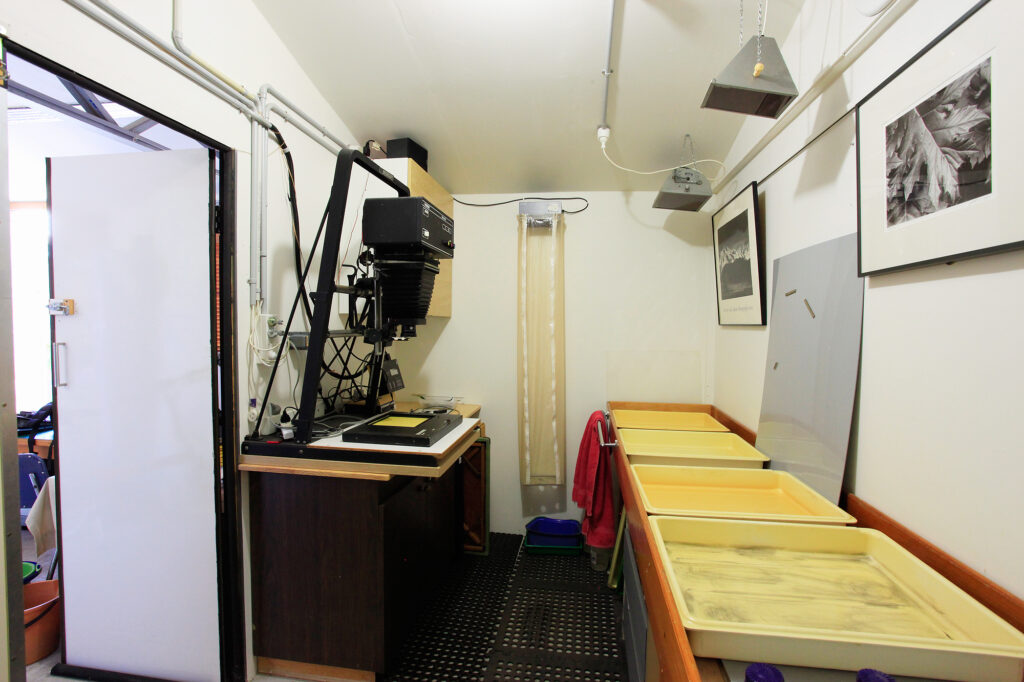
Within the door frames, I use mat black paint to cut reflective light from coming through. In addition to this, I use draught-proofing adhesive rubber strips to further lightproof the door seals. If the main shed door remains closed the darkroom remains pitch dark, even in the middle of the day in full summer light. In this way, black curtains over doorways are not needed. Curtains can become a source of dust and unless drawn right back restrict air movement when the darkroom is not in use.
My darkroom follows the usual wet side, dry side design, so you enter the dry side where I have my enlarger and cabinets for storage. On the opposite side, I have my wet bench, chemical storage, and my print drying racks. The rationale behind keeping one side wet and the other dry is to maintain electrical safety. Don’t mix your electricity and conductible surfaces with water.
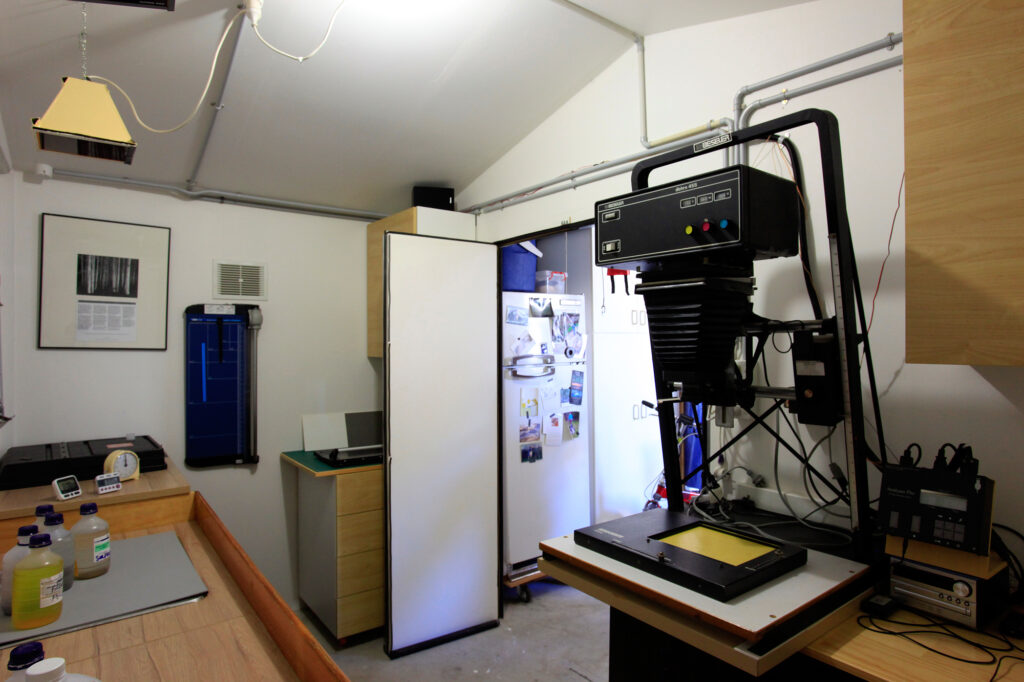
Above my wet bench there are three safelights with Ilford 902 filters for illumination during darkroom procedures. The safelights are powered through my enlarger’s exposure meter. When I take exposure measurements of a print or during print exposure, the darkroom lights automatically switch off.
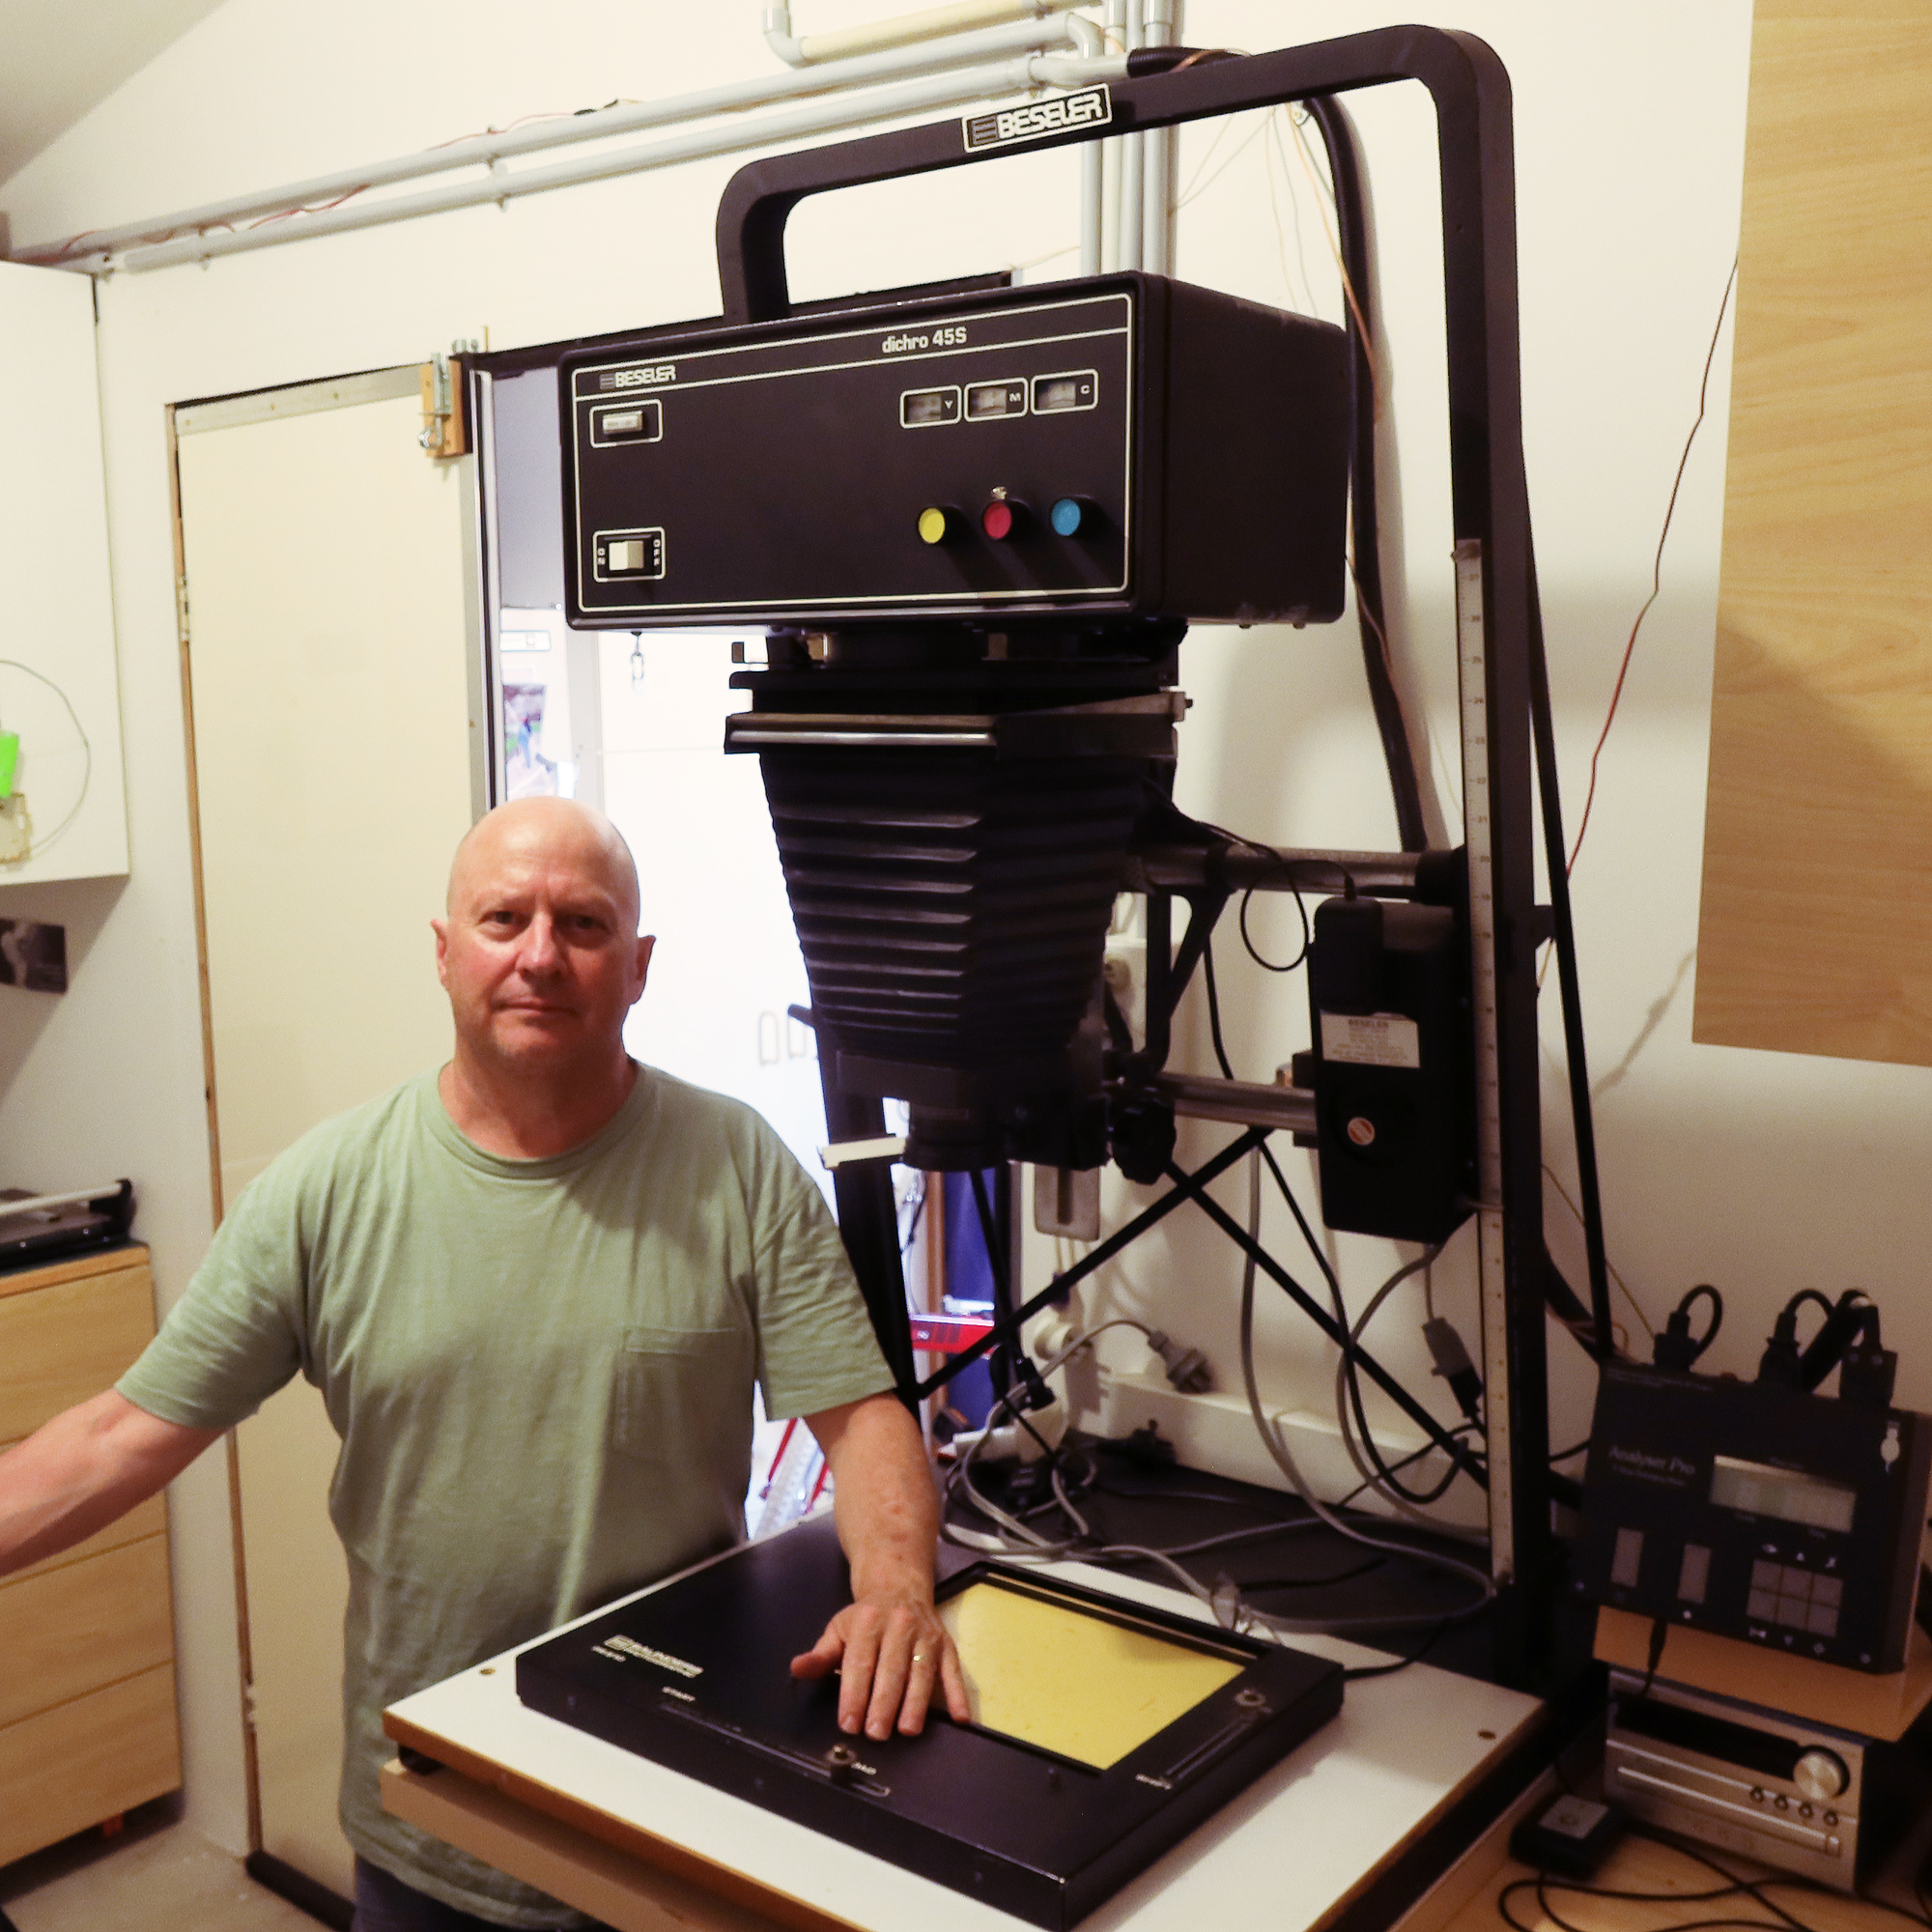
I use a Beseler 4×5 MXII enlarger which I picked up second-hand over 35 years ago. This is the first and only 4×5 enlarger I have owned and took me a long time to find. I found it in a Sunday newspaper’s For Sale section, in those days a weekly ritual before the internet. It belonged to a Perth advertising and commercial photographer who was exiting the business. It came with a Beseler condenser head.
I never intended to use the Beseler condenser head, replacing it with a Zone VI cold light head and stabilizer. When I purchased this light source graded papers were generally available.
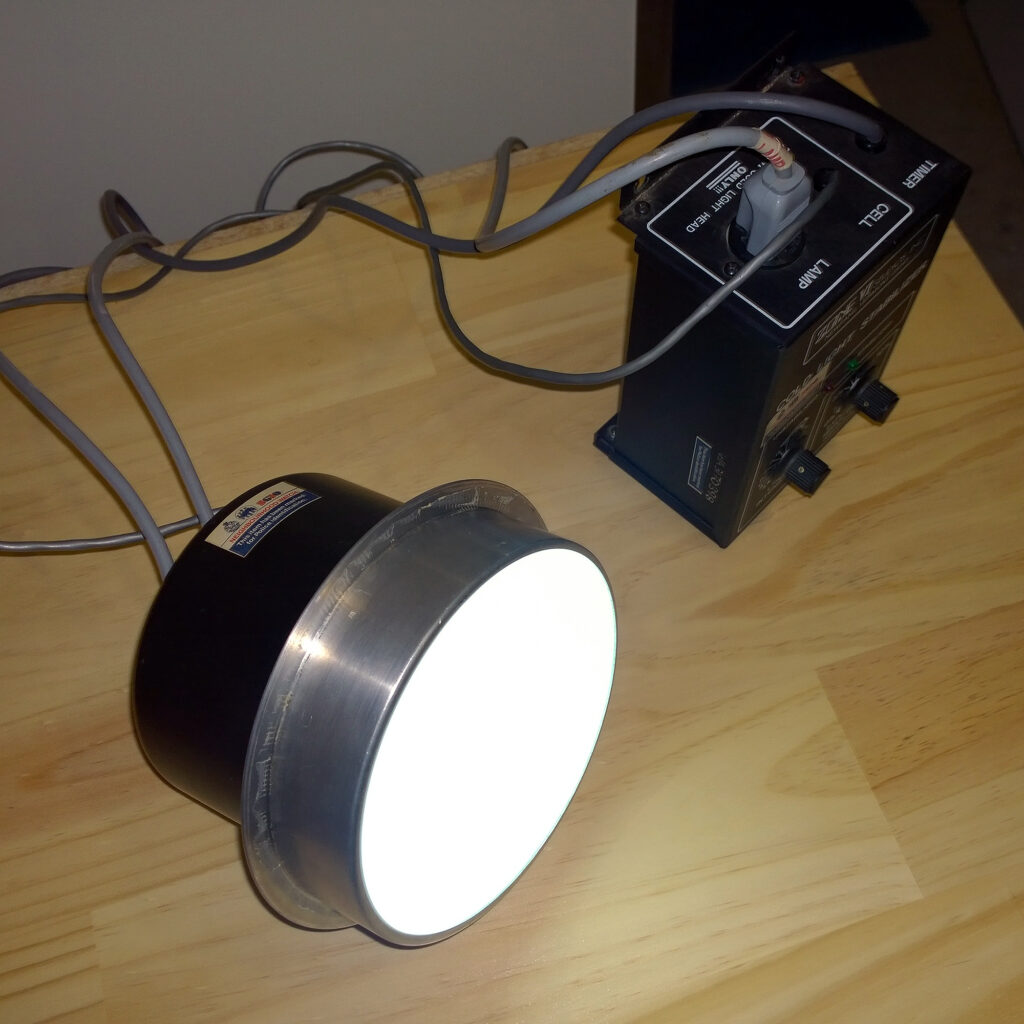
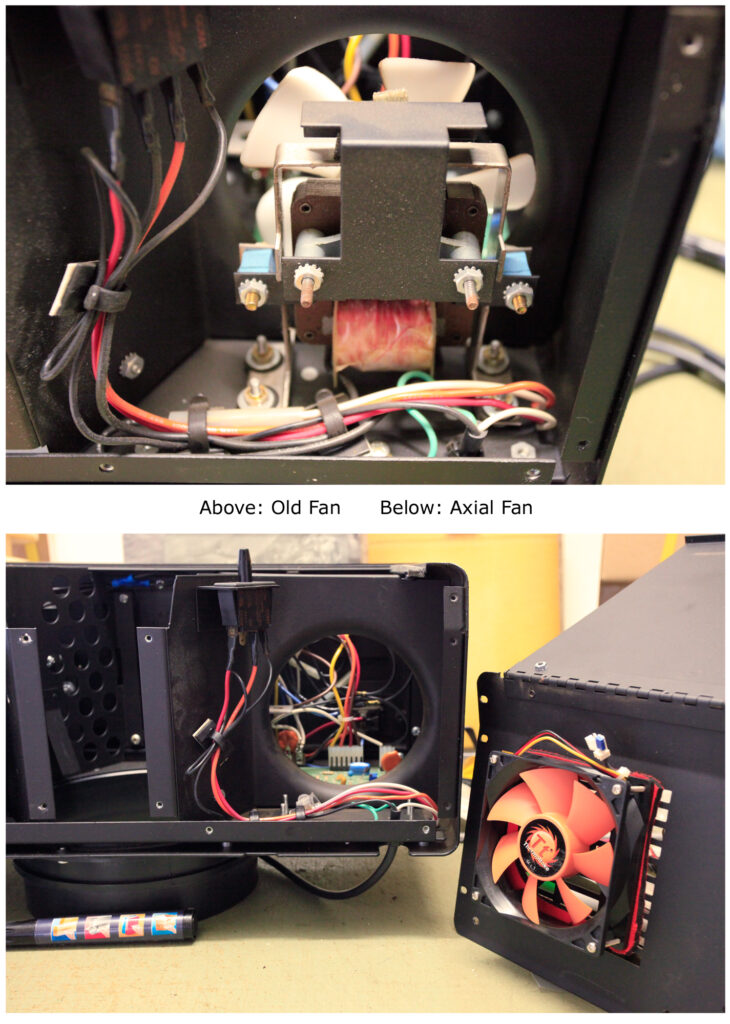
Much later, I purchased a second-hand Beseler Dichro 45S head to replace my Zone VI cold light. This was so I could take full advantage of the multigrade fibre-based papers that were becoming more commonplace. I modified the head slightly by replacing its original cooling fan with an axial fan for smoother, quieter operation.
With the use of multigrade papers, I decided to replace my regular enlarger timer with an Analyser Pro F Stop Enlarging Meter, from RH Designs in the UK. This meter works using f-stop-related exposure times, rather than discreet seconds. It also automates the test printing and exposure calculations, so every consecutive strip can be as little as one-twelfth of an f-stop apart.
The meter has a visual guide of print zones which during negative density analysis can give you a guide as to which print value of the zone system a chosen exposure will fall on. Making readings across a negative maps out the Zone system print values from light to dark. It even takes into account different exposures for variable contrast paper grade filtration.
While I still make my prints using multiple test strips, the Analyser Pro gets me into the ballpark quickly, and the f-stop timing makes a lot of sense.

Two years ago I installed a sink within my wet bench. I have yet to get around to plumbing it in. In the meantime, five-litre buckets and a handy garden tap still suffice for me.
I have worked in a range of darkrooms, from commercial and wedding photographers, one-hour labs, and 35mm motion picture film, to large multi-darkroom complexes with floor areas the size of a house. My experience with larger darkrooms is that they can be inefficient. Much like a kitchen, being able to work on the dry side and then simply turning around and working on the wet can be more ergonomic. I remember a work colleague who dropped an important roll of colour film on the floor of a large darkroom. Finding that film in the dark, crawling around on the floor, took a long time!
Darkrooms can be as complex or as simple as you like. If you are thinking of making a space into a darkroom, my key points would be:
- Consider the space. 2 x 4 metres is just enough for me. It doesn’t have to be huge.
- Consider the safety around exits and entrances.
- Ventilation is the healthy option, fresh air in and stale air out
- You will need a power supply, keep it on the dry side
- You don’t need plumbing to start with, but it will make life easier
- Apart from internet research, don’t forget to visit your local library’s photography section as there are many good books with various darkroom plans and ideas published over the years, which might inspire you.


Thanks Alex for sharing your Darkroom with us, I like its simplicity. I too have had two home built darkrooms in sheds over the last 50 years I’ve been doing photography and a couple of commercial darkrooms when I worked professionally in the 1980’s. Now I just do my own art b&w photography for myself. I strongly agree with you that smaller darkrooms are more efficient and easier to work in and cheaper to build than large ones!
Currently, I develop my medium format and 4×5 films in a laundry set up like most people would do, and then scan my negatives on a Epson Flatbed scanner, but, I’m keen to convert half my shed into a Darkroom, and get back into printing again. So, thanks for the inspiration and your darkroom journey, loved it!
Cheers, John
Hi John, I’m pleased you are getting some ideas about converting part of your shed to a darkroom and getting back into your printing again. Printing your images adds a very special quality to your photographs. One thing I did not mention in the article was that I put insulation in the walls of my shed between the colorbond and plasterboard. The trees outside my shed provide much-needed shade when it gets hot here in Perth. On very hot days or heat waves, I don’t go in the darkroom! All the best with your new darkroom plans.
Thanks Alex, yeah I would insulate as well. I live in the Adelaide hills and we get the odd 41 degree day during summer, so insulation is a must, even for the cold winters, to keep a bit of heat in the darkroom.
Cheers