F.Stop Workshop is a photography organisation and portrait studio based…
Darkroom – James Pierce. Part two
Part two of three articles leading up to the ‘super’ darkroom. Part one can be seen here.
Almost a decade ago we found a great shed for sale up the road; we sold our house and bought the shed, moving into the house which was attached on the title. After creating a permanent but tiny darkroom at home previously (see part one), having a ‘real’ darkroom at home had become a deeply-held dream. This was my chance.
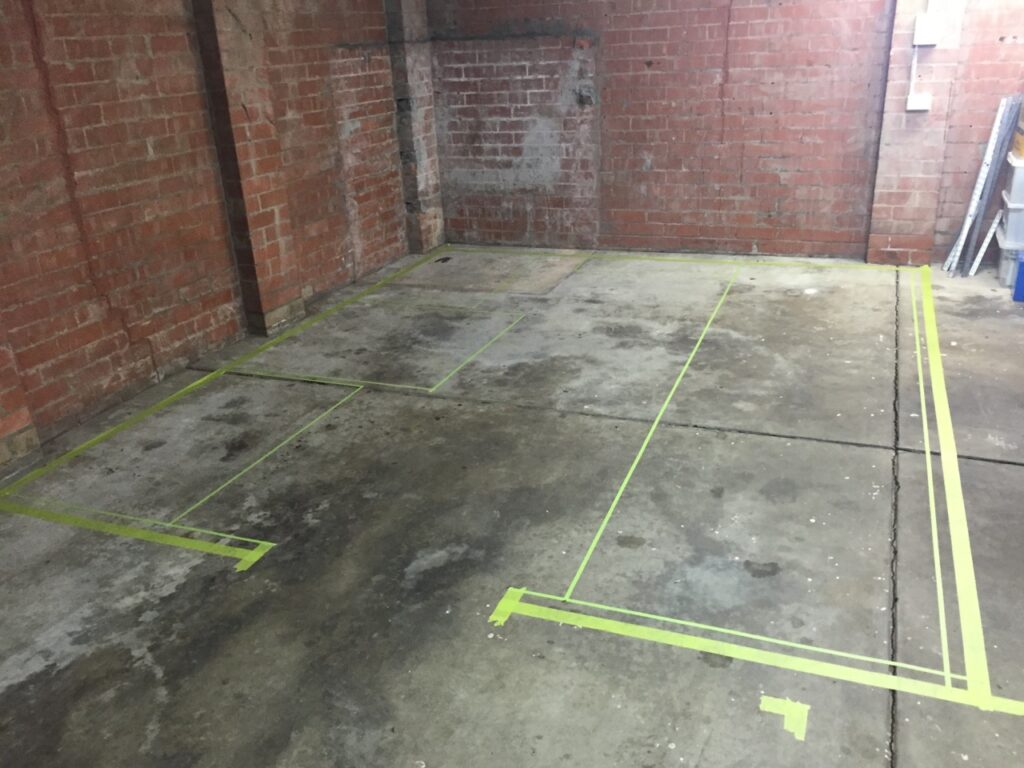
I’d been planning for a real darkroom one day, and over a few years and with the help of friends had collected a big sink, print washer and a few other hard-to-find items required to make a dream space. The sink defines your space. This one is 3m long, big enough for four 20 x 24 trays. A range of floor plans were tested using the sink as an anchor. In the end we decided on a door at the end of a central walk way with classic wet side and dry side layout. (You can see the final layout being tested with tape.)
Upon the advice of a few trusted advisors the decision was made to do it properly while we had easy access for plumbing, electrical and ventilation and so on. A room roughly 3 x 4m was built within the shed, plumbing and electrical cables threaded through the walls and roof before they were heavily stuffed with insulation. The walls were clad with MDF and painted with left-over house paint. The room looks pretty good but on the whole was fairly cheap to put together. A small split air-con system is an indulgence, although maintaining a steady 21 or 22 degree temperature at any time of the year is a huge advantage for consistent processing. Tempered and filtered water and dedicated safe light and ventilation circuits are another small convenience that’s easy to build at the start, and harder to retrofit.

With a few rare exceptions nearly all the gear has been rescued from the rubbish pile somewhere, or recycled from other darkrooms. There are only a few things which still remain expensive or hard to find: large easels, large print washers and 8×10 enlargers. In the grand scheme of a life time of photography even these things are incredibly cheap – in many ways there was never a more accessible time to enjoy the darkroom craft than when I built this space. I certainly wouldn’t have been buying my CLS 2000 8×10 enlarger 20 years ago and trying to buy one today would be hard as well.

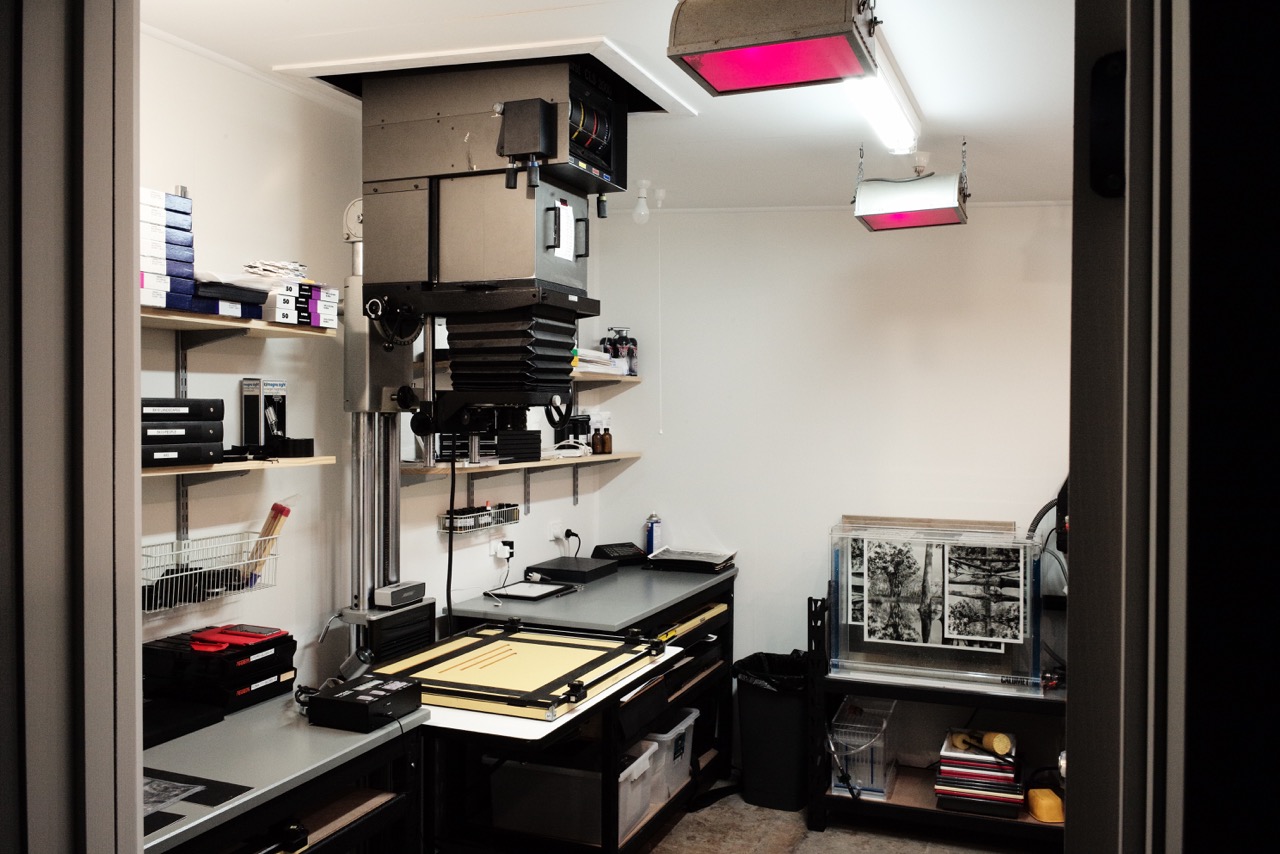
The workspace was broken up into the classic wet and dry areas either side of the large central walkway. Starting on the dry side, one bench is dedicated to negative storage, contact printing, mask making and sub-miniature format (35mm). The heart of the space is the CLS 2000 8×10 enlarger. I thought 2650mm would be enough height for 8×10, but if you look carefully in the photo you’ll see a little extra height had to be created later via a hole in the roof – and even with this modification I miss out on the last little bit of column height. To the right of the CLS is another bench for Pt/Pd preparation and UV exposure as well as print pressing.

The big print washer at the end of the room marks the transition to the wet side which is completely dominated by the long stainless sink rescued for me from an old map creation facility. Drying screens and lots of storage reside under the sink. I learned a lot about storage from the tiny darkroom and had a huge amount of adjustable shelving left over from it and other rooms in the old house. You can never have enough storage in a darkroom!
There are a couple of things which worked out very well: the room lighting is all activated by pull switches, easy to find in the dark and always safe with wet hands. I have a couple of old Gralab timers which can be activated by foot switches to time processes, and the enlargers all have foot switches also; this makes dodging and burning much easier and basic printing just a little quicker.

As a finished space, it was luxurious solo and ideal for two people to work simultaneously, and a third keeping company and rocking trays was welcome without getting in the way. A big thanks goes to Brett, Michael and Brian for all their time and energy to make this one happen.
Then we moved house again… stay tuned for Part Three.