How to make a 2×5 adaptor for 4×5 film holders by David Tatnall
I don’t like to crop my negatives; in fact I almost always make my photographs by composing them to the very edge of the focusing screen and printing the whole negative. However there are times when a photograph needs to be a different size than 4 x 5. I’ve found that some subjects need to be in ‘panoramic’ format.
To achieve this without cropping the negative, I’ve made an adaptor that makes two 2 x 5 negatives on the one sheet of film. This is simply made out of a spare 4 x 5 dark slide that has a section cut out of it.
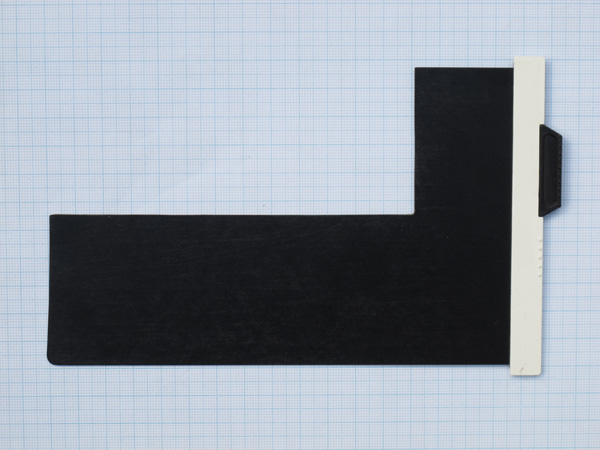
The dark slide measures 107 mm x 166 mm (not including the notched grip end). A piece is cut out leaving an ‘L’ shape. The piece removed is 53 mm x 130 mm, leaving a 34.5 mm end at the notched grip end. It’s very important that this is measured carefully as light will leak in the end if the measurement is incorrect.
The plastic dark slides are easy to cut with a fine saw, and are then lightly sanded. Older aluminium dark slides require a bit more care while cutting.
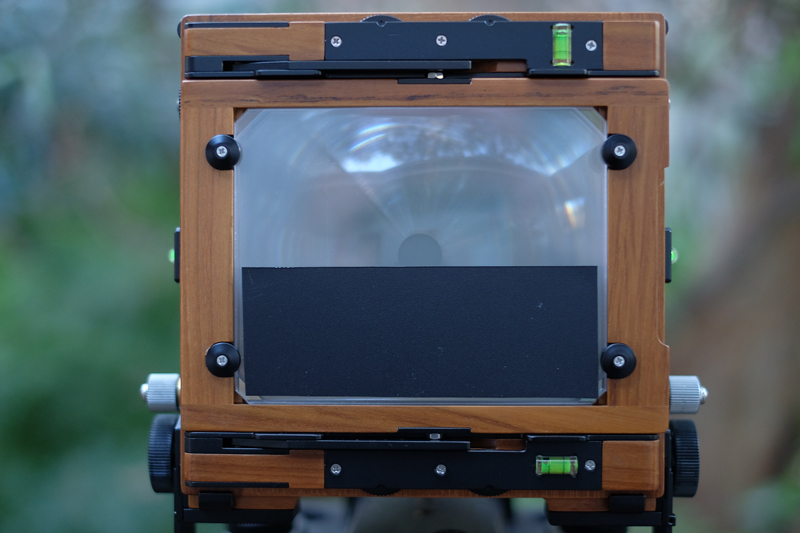
I’ve made up a mask that I tape on the ground glass focusing screen while composing (photograph below). If I’m using the top half of the film, I cover the bottom half of the focusing screen with the mask and compose the photograph. I then remove the (whole) dark slide and insert the half slide – covering the bottom half of the film – leaving the top uncovered. I make the exposure, remove the half dark slide and insert the whole dark slide.
I mark an ‘X’ for exposed – in pencil – on the film holder corresponding to the half of the film I’ve just exposed to avoid a double exposure.
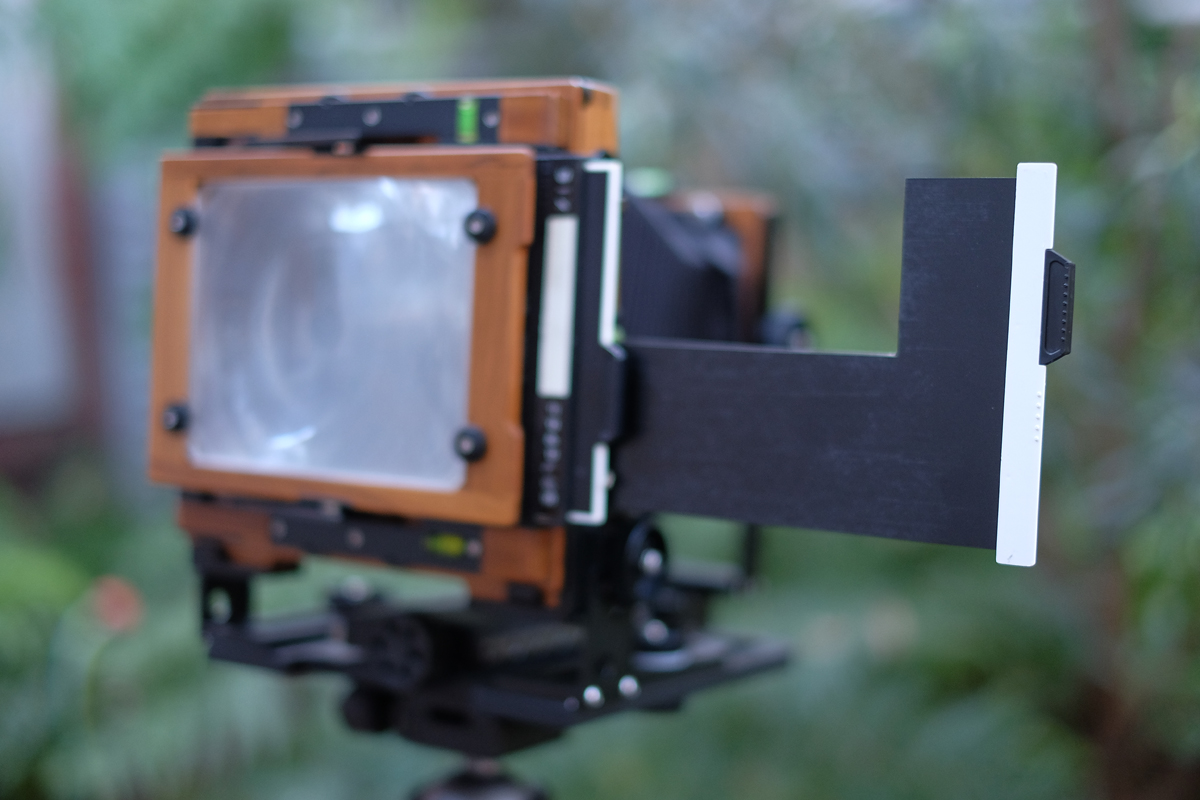
For the second exposure the mask is placed covering the top half of the focusing screen, leaving the bottom uncovered, and the process is repeated exposing the other half of the film (main photograph above shows 2×5 adaptor exposing the top half of the 4×5 film).
You should end up with two 2 x 5 negatives on the one piece of film. Of course you can make vertical photographs too (photograph below).

The same process can be adopted to make two ‘panoramic’ exposures on the one sheet of film for any size large format film holders.
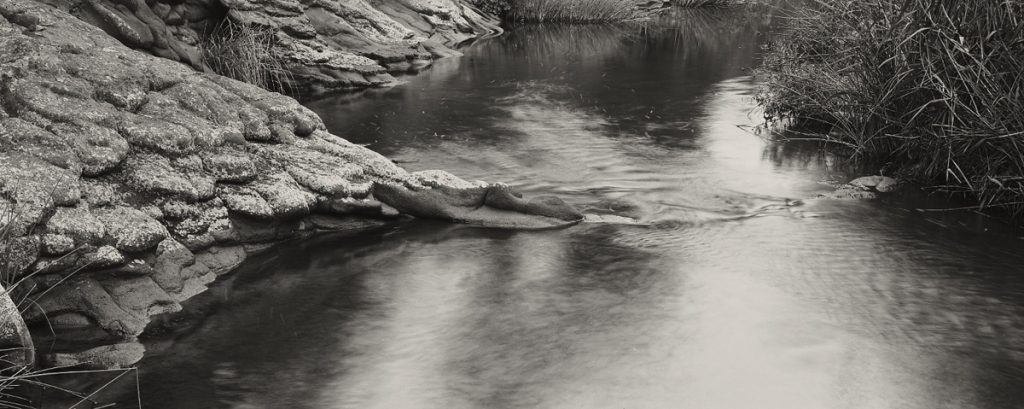
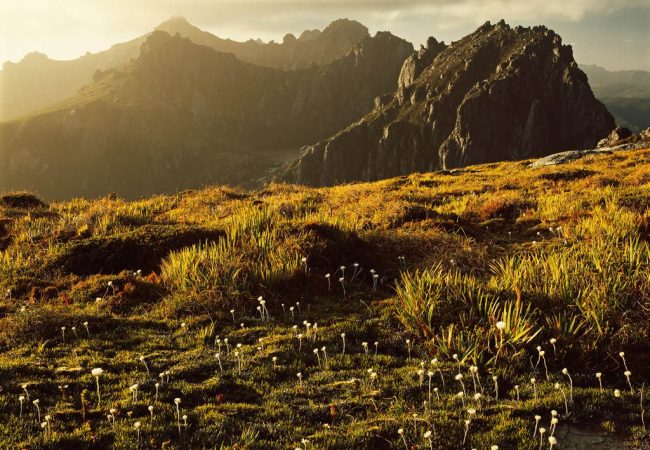
Galada Tamboore – Merri Creek Gorge. 8×20 print from 2×5 negative
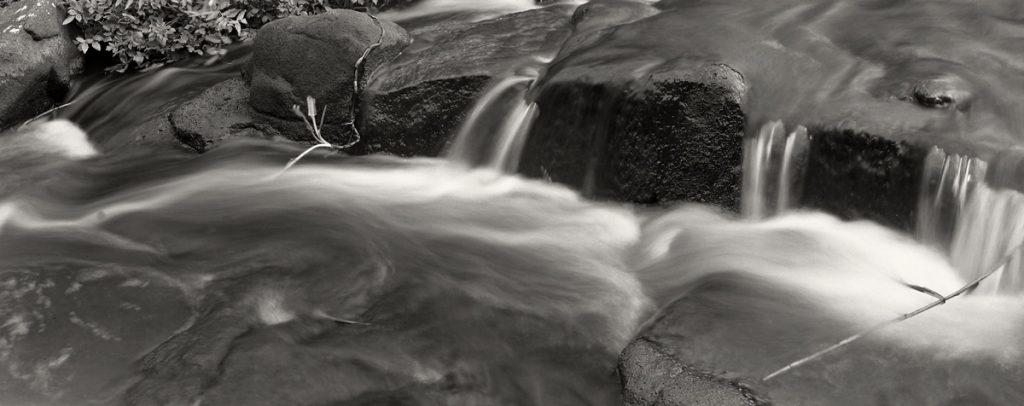
Rapids, Galada Tamboore – Merri Creek Gorge. 8×20 print from 2×5 negative


Just curious, what type of saw did you use to cut the dark slide? I’ve been considering using a box cutter but I doubt I could get it too straight.
Tim, I used a fret saw with a new sharp blade. I then used a fine file to clean up the cut.
Awesome, I’ll give that a shot. Thanks!
This is superb! I have been thinking of a panoramic back for a while however may give this a go! Thanks
Thanks, it’s a very easy and not so expensive way of making panoramic photographs.
Much cheaper than buying a Horseman RFH.
David, that’s a great innovation to a achieve panorama images on a 4×5 camera and I think I’ll give it a try for my Area-Swisse 4×5! It’s certainly a cheaper option than what I have, a Sinar Zoom that takes 120 or 220 Rollfilm. It cost me about $750 on eBay. Having said that, the SinarZoom has multiple image configurations that can be changed mid-roll, being 4.5 x 6, 6 x 6, 6 x 7, 6 x 9 and 6 x 12, the latter being the configuration I use for panoramas.
Thank you Ray, not only cheaper but also lighter!
What a great idea! I’ll have to try this.
I have a 5×7 back for my 8×10 camera, that has two sliding boards (up & down)(left&right), that create four 2.5 x 3.5inch images on one sheet of 5×7 film.
This all reminds me of a job interview I had with SoCal AAA a long time ago. The guy showed me a 35mm slide that had two different image on it that were split on the diagonal. He asked me how it was done. This was way before Photoshop. His trick was to put a wedge of cardboard inside the camera, between the lens and the film, shoot and flip it and shoot. I still don’t know how he got the wedge flipped and how he got the film frame lined up again. Maybe that was still part of the test, to call BS on his explanation or not.
This is fabulous, and in principle an idea I had the other day when searching for a 6×17 back that would work on a 4×5 or 5×7 camera. What I was able to find was too expensive for my limited budget, but this, I could afford! Thank you, sir!