
Stand Development by Alex Bond
Stand Development increase film speed and extend contrast range
What is Stand Development?
If by chance you have not heard of stand development, it involves using highly dilute developer with minimal agitationand long processing times. Initially, it may sound like a great recipe for a film developing disaster. But you might be surprised at the results and potential benefits.
Now there are plenty of online forums spruiking stand development. They have even gone as far a coining the term modified stand development. But there is little information giving objective measurements.
So, I thought I’d explore stand development to see if I could quantify its effects using my own materials and procedures. So I conducted a series of simple film density tests designed to see what happens to the light and dark parts of the negative respectively.
Let’s cut to the chase
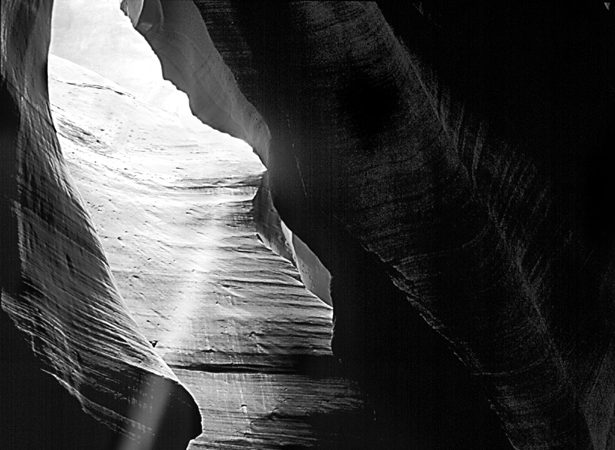
What I found out was impressive. Using this much slower method of development I could increase the film’s speed by about one half stop. But wait, there’s more. Using the combination of Ilford FP4 and Foma’s R09 developer I could also achieve contrast contraction by 4 stops. That is N-4 in Zone System parlance. Now, if you have a high contrast scene like the paperbark at Bannister Creek above, then this developing technique can be a highly useful contrast controlling tool in your photographic technique repertoire. You can read more about the making of this image in The Photograph Considered Number 2.
The problems with reduced development
So why not just give a high contrast negative N-1 or N-2 development? Well, here are 3 good reasons.
Let’s say your normal film development time is 8 minutes. To achieve N-1 you could estimate 25% less development time, making the new time 6 minutes. Taking it further to N-2 would require another 25% reduction, leaving just 4.5 minutes development time. That’s pretty short. Even with pre-soaks you risk uneven film development for times of less than 5 minutes. Now imagine N-4, that would be about 2.5 minutes development!
When development times are shortened it follows that shadow areas of the negative also receive less development. This result is loss of shadow details and effective film speed and this has been well documented in Ansel Adams’ photography series The Negative.
Weak shadow areas appear very dark with little tonal separation in the print. You can compensate for film speed loss by giving the image more exposure. But in a high contrast scene you blow your highlights out further towards the opposite end of the tonal scale.
To compensate for additional exposure given to the highlights, you then need to decrease your development. You get the picture, we are chasing our tails.
Stand development offers a way out of this circle chase. High contrast situations abound in photography and one of the chief benefits of stand development is its ability to lower film contrast without loss in film speed.
Treading where others have gone before
In 1995 John Sexton travelled the globe giving a series of lectures promoting Kodak Elite black and white products. I was lucky enough to attend one of John’s packed out, full day presentations.
During the day John Sexton discussed his use of minimal agitation and dilute developer in handling extreme contrast. He was photographing the space shuttle and Hoover Dam for his book Places of Power. Sexton outlined in detail his use of dilute HC110 developer. Not only did he achieve lower contrast but he found there was an improved separation of middle to low print values.
What really piqued my interest in stand development was a reference by Bruce Barnbaum’s in The Art of Photography. Barnbaum attributes the late Ray McSavaney as being a frequent user of stand development. I purchased a copy of Ray McSavaney’s book Explorations. He is a master photographer and his photographs are stunning. In his technical notes he briefly mentions the use of long development times with very dilute developer which he states, “gives me a compensating effect that allows me to hold more detail in the shadow and highlight areas”.
How does stand development work?
Basically when you develop a negative different parts of that negative develop at different rates. Those parts of the negative that have received large amounts of exposure have received a lot of light energy. They are hungry for the chemical developer and can deplete the immediate developer in close proximity of its chemical activity. Unless the negative in that spot receives more fresh developer via agitation, development of the negative will slow. This is sometimes called the compensation effect.
Conversely, those parts of the negative that have received small amounts of exposure have received very little light energy. Their appetite for the chemical developer is pretty low. It take much longer for the developer in close proximity to the film to lose its chemical activity. Hence development can continue for longer periods without need for agitation.
Developers which work well in this manner are referred to as compensating developers. Different developers with different film speeds produce varying amounts of compensation.
Using step wedges for tonal comparison
To chart my results in a measurable way I reverted back my use of step wedges as previously described in my post on conducting film speed tests. Making a series of step wedge photos photographed in identical lighting I exposed the films one after the other and put them aside for developing later under differing developing conditions.
I will describe 4 different test conditions for comparison.
1. Normal development 10 min with LC29 rotary agitation
My normal development for Ilford FP4 and LC29 is 10 minutes @ 20ºC with continuous rotary development in a Jobo processor. I dilute 15mls of LC29 concentrate with 585mls water. After development I follow with the standard stop bath and fixing procedures
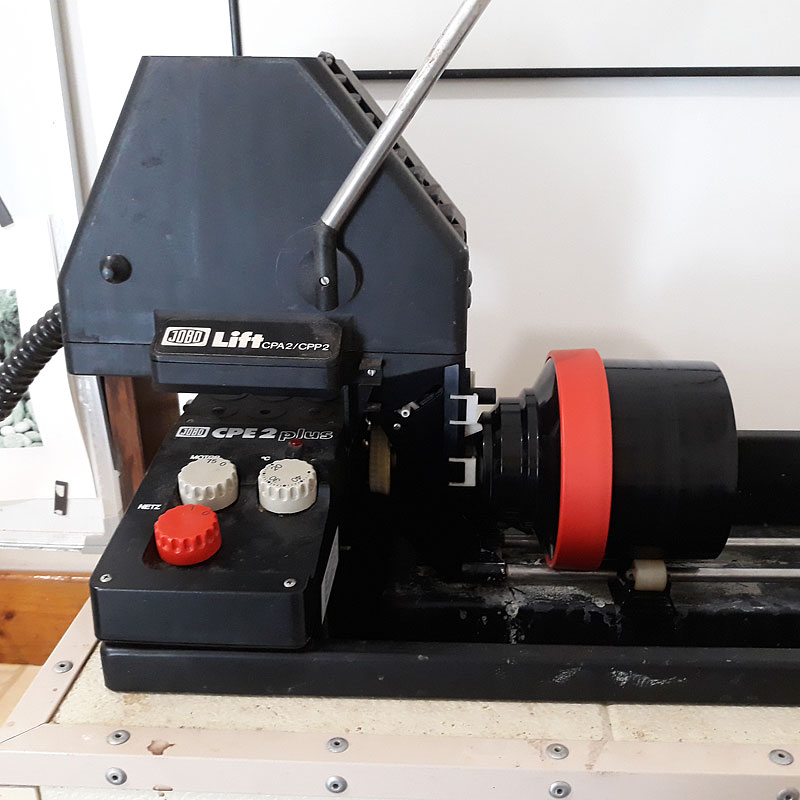
2. Stand development 30 min with LC29 developer
My first stand development tests with Ilford FP4 4×5 was with my regular developer of choice Ilford LC-29. After several tries I eventually settled upon the following: 30 minutes using 15 ml of LC29 added to 1400mls of water.
Stand Development Processing
| T 33 min to 30 | Pre-soak the film in water @ 20ºC for 3 minutes |
| T 30 min to T 29min | Pour the developer into the tank,(I use 15ml LC29 plus 1375mls water = 1400mls) invert tank 40 times in 40 seconds |
| T 28 min | 5 tank inversions in 5 seconds |
| stand tank in water-bath | |
| T 20 min | 5 tank inversions in 5 seconds |
| T 10 min | 5 tank inversions in 5 seconds |
| Final 20 secs | discard the developer and proceed with normal stop bath and fixing |
| Total 55 inversions in 55 seconds |
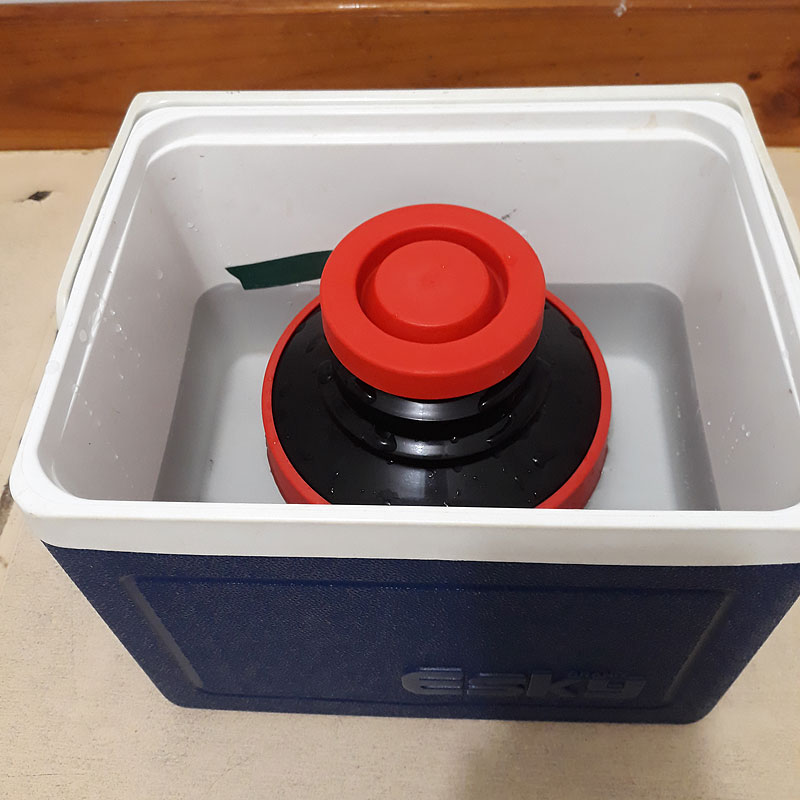
3. Stand development 30 min with R09 developer
- 30 minutes using 6 ml of R09 added to 1400mls of water
- All other steps the same as in test 2.
4. N-2 development 6 min with LC29 continuous agitation
N-2 development for Ilford FP4 and LC29 is 6 minutes @ 20ºC with continuous development in a Jobo processor. I dilute 15mls of LC29 concentrate with 585mls water. After development I follow with the standard stop bath and fix steps.
Using Step Wedges as Visual Check for Print Values
I am more interested in print values on photographic paper rather than density values of a negative. Step wedges manufactured to predetermined negative densities allow me to perform visual checks without the need of a densitometer.
Each step wedge has 21 steps. Each step represents a one half stop difference. Step 1 measures Zone 10 and Step 21 measures Zone 0. Likewise, Step 11 represent Zone 5, Step 7 represent Zone 7 and Step 5 represents Zone 8.
All the step wedges were given my standard proper proof time of 15 seconds on grade 2 paper.
Comparison of the high values
To help visual comparisons I have grouped all the high value results together.
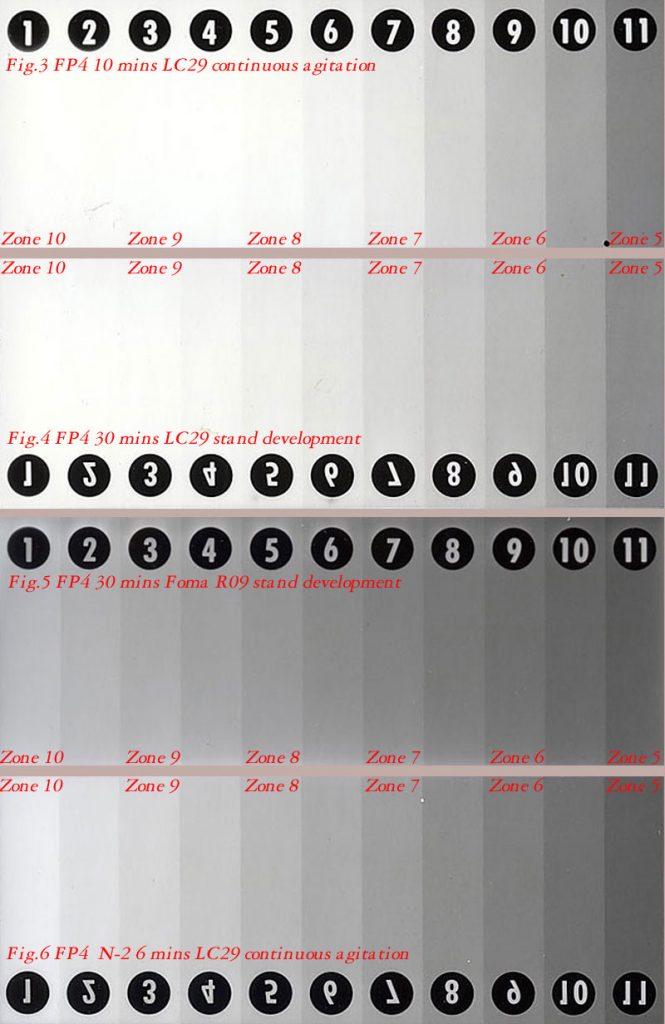
Fig.3 Step wedge for FP4 10 mins LC29 continuous agitation shows normal development for the highlights. Texture would be held in Zone 7 but by Zone 8 fades to just off paper white. This is normal contrast as printed on normal, grade 2, photographic paper.
Fig.4 FP4 30 mins Stand development in LC29, shows good Zone 5 equivalent middle value at Step 11 compared to the Fig.3. Its high print values at Zone 8 shows slightly more tone than Fig.3, indicating slightly less highlight development. The degree of contraction is about N-0.5 or half a stop.
Fig.5 30 mins Stand development in Foma R09. Notice the extended greys from Zone 5 right through to Zone 10. There is no pure white showing. Development of the negative receiving the greatest amount of exposure has been slowed right down. On this test it looks like the degree of contraction is N-4 or greater.
Fig.6 N-2 development 6 min LC29 continuous agitation, Zone 10 has greater whiteness and hence negative density than the R09 wedge immediately above in Fig.5. However its grey scales extend much further from Zone 5 to Zone 10, compared to Fig.1 and Fig.2. Contraction appears close to N-2.
Comparison of the low values
Now let’s examine the low print values. Again, to help visual comparisons I have grouped all the low value results together. Step 11 represents Zone 5, Step 15 represent Zone 3 and Step 21 represents Zone 0.
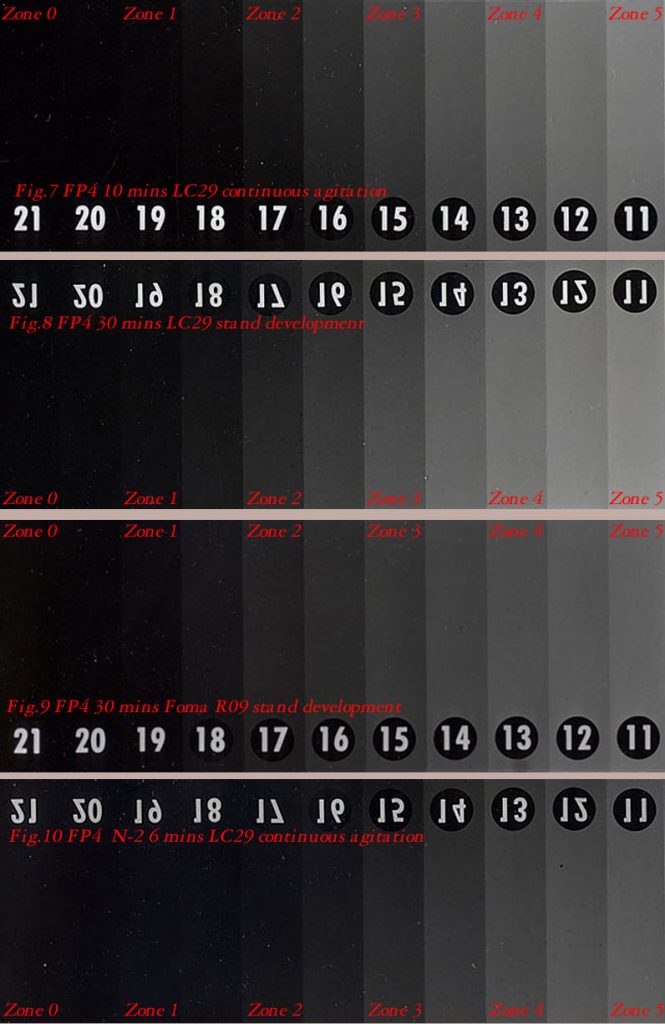
Fig.7 for FP4 10 mins LC29 continuous agitation shows normal separation for the low print values. Shadow texture would be held in Zone 3. But by Zone 1.5 it almost becomes indistinguishable from paper black. This is normal contrast as printed on normal, grade 2, photographic paper.
Fig.8 FP4 30 mins Stand development in LC29 shows an improved separation of values in especially around Zone 2 and Zone 1.5 when compared to Fig.7 above. On the photo paper proof expansion look equivalent to about one-half stop. That is one whole step in the step wedge.
Fig.9 30 mins Stand development in Foma R09, again there are improved separation of values in especially around Zone 2 and Zone 1.5 when compared with the normal wedge above. There is about half a stop in film speed gain. Zone 5 looks a little darker than Step 11 in the normal wedge.
Fig.10 N-2 development 6 min LC29 continuous agitation. Zone 2 is darker than its equivalent Zone 2 in the normal wedge Fig.7. This would suggest a film speed drop of one half stop, consistent with the findings of other photographers.
Summary
- Stand Development with Ilford FP4 4×5 film not only can reduce film contrast but can increase film speed with improved separation of low to middle tones. This was achieved with both Foma R09 and Ilford LC-29 developers when using 30 minute developing times.
- At 30 minutes development Foma R09 demonstrates a greater “compensating” effect than Ilford LC-29. The R09 at 30 minutes achieved a contraction in high values of at least 4 stops.
- In general longer development of film with subsequently less agitation assists in the improved separation of the middle to lower values. Using different films and developers, this technique allows for the potential of both near normal film contrast and lower film contrasts to be achieved.
- Stand Development may particularly benefit roll film photographers who have a mix of image contrast ranges on the one roll of film.
Finally I’d like to finish with a quote by Steve Anchell in The Darkroom Cookbook:
There are several advantages to stand development. First, it maximises adjacency effects creating negatives of the highest acutance. Another is that it has a compensating effect on highlights, which develop rapidly at first and then slow down as the developer exhausts. Meanwhile, low-density areas continue to develop. Yet another is that it tends to increase emulsion speed. These benefits also accrue with minimal agitation, mentioned earlier, but to an even greater extent using stand development.
The Darkroom by Steve Anchell.
References
Ansel Adams, The Negative, second volume of the Ansel Adams Photography Series, New York Graphic Society, 1981
Bruce Barnbaum, The Art of Photography, 2nd Ed, Rocky Nook California, 2017
John Sexton, Australia and New Zealand Tour 1995 Seminar Notes, Kodak Professional Imaging, 1995
Ray McSavaney, Explorations: A Photographic Journey, 1st Ed, Findlay & Sampson Editions, Los Angeles, California, 1992
Steve Anchell, The Darkroom Cookbook, 3rd Ed, Focal Press, San Francisco, 2008.
Foma R09 can be purchased in Australia from Chris Reid at Blanco Negro
Alex Bond likes to take a couple of sheets of film, his 4 x 5 field camera and wander around parks and bushlands.
Main photograph above: Stand development film FP4: Bannister Creek Perth, hand printed silver gelatin 16 x 20 by Alex Bond.


Excellent review Alex
Thank you Ellie.
Thank you Alex for this well researched and detailed explanation of stand development.
Thank you, David, I can assure that stand development of film is easier than my explanation of its benefits!
Interesting but you used two different developers for your comparison vs change of dilution. I’m not familiar with either of these developers so can not envision their natural behavior.
Hi Eric, you are correct in that I have shown the effects of two different developers with different dilutions to each other. But what I am interested in demonstrating is their effect on the film’s tonal range. I am using the step wedges as an objective, observable outcome which accounts for variables such as dilution and a developer’s characteristics.