Darkroom – Mat Hughes
The sudden blunt force of my wife evicting me from our shared office was the catalyst for my darkroom. One night she threw up her arms and calling time on our shared office space, having reached her limit for the clutter that was slowly encroaching on her side of the office.
As damaged as I was by this sudden eviction, looking back, I can see what a smart move it was and I’m grateful for her forward thinking. She is the brains of the operation. And after some juggling around it was decided that I would have the daughter’s old bedroom.
Physics states that a gas will expand to fill the space it is given. If I look back at our shared office and compare that to now, I can see that my practice has catapulted forward. I do things now that I could only previously have dreamed of. That`s not to say that I don`t long for a larger space, because I am, as people frequently point out, full of gas.
Darkroom vs Dim-room
My darkroom is not a darkroom. It is a dim-room. For those who are unsure about the difference between a darkroom and a dim-room, I shall describe briefly in general terms.
A traditional darkroom is one used by workers who are mainly involved with the silver gelatin process. The room must be 100% light-tight for handling unexposed film. A red safelight is used for handling unexposed photographic paper. Daylight will fog both unexposed film and paper. This means constructing a darkroom with no ambient daylight leakage anywhere. Extra care is needed with doors and windows and the silver gelatin process benefits from a ready supply of water to be at hand.
However, if you are drawn to some of the older historical printing processes then a dim-room can be a viable alternative. Not all printing processes are as light sensitive as the silver gelatin process, which is a relatively modern and fast process. For the older printing processes that have different light sensitivity characteristics, the task is instead to construct a working environment where it’s acceptable for the lighting to be subdued rather than light-tight… to a degree.

Printing style
Prior to fitting out my new space, I needed to take a hard look at the direction my work was going. Not an easy task but one made slightly easier by the fact that my dream of having Durst Laborator 138 enlarger was doomed as it would never in fit the space. And no, I wouldn’t have settled for anything smaller!
This in effect put the kibosh on ideas of using the space for silver gelatin enlargements. The decision was softened at the time knowing that Melbourne had at least three fairly reasonable community darkrooms available to hire. It also helped that I recognised myself as a hybrid worker, choosing to work with both traditional and digital components in my particular printing workflow.
For me, in terms of equipment, that means everything from large format cameras up to 10×8 for film exposures, through to scanning and digitizing equipment, inkjet printer for digital negatives, chemical preparation, paper coating, UV exposure and finally print finishing and presentation.
The deal was sealed for a dim-room when Covid struck Melbourne and we were locked down for what would be almost two years. If, like me, you have that overwhelming need to print almost daily then you too would have embraced the dim-room.
General design
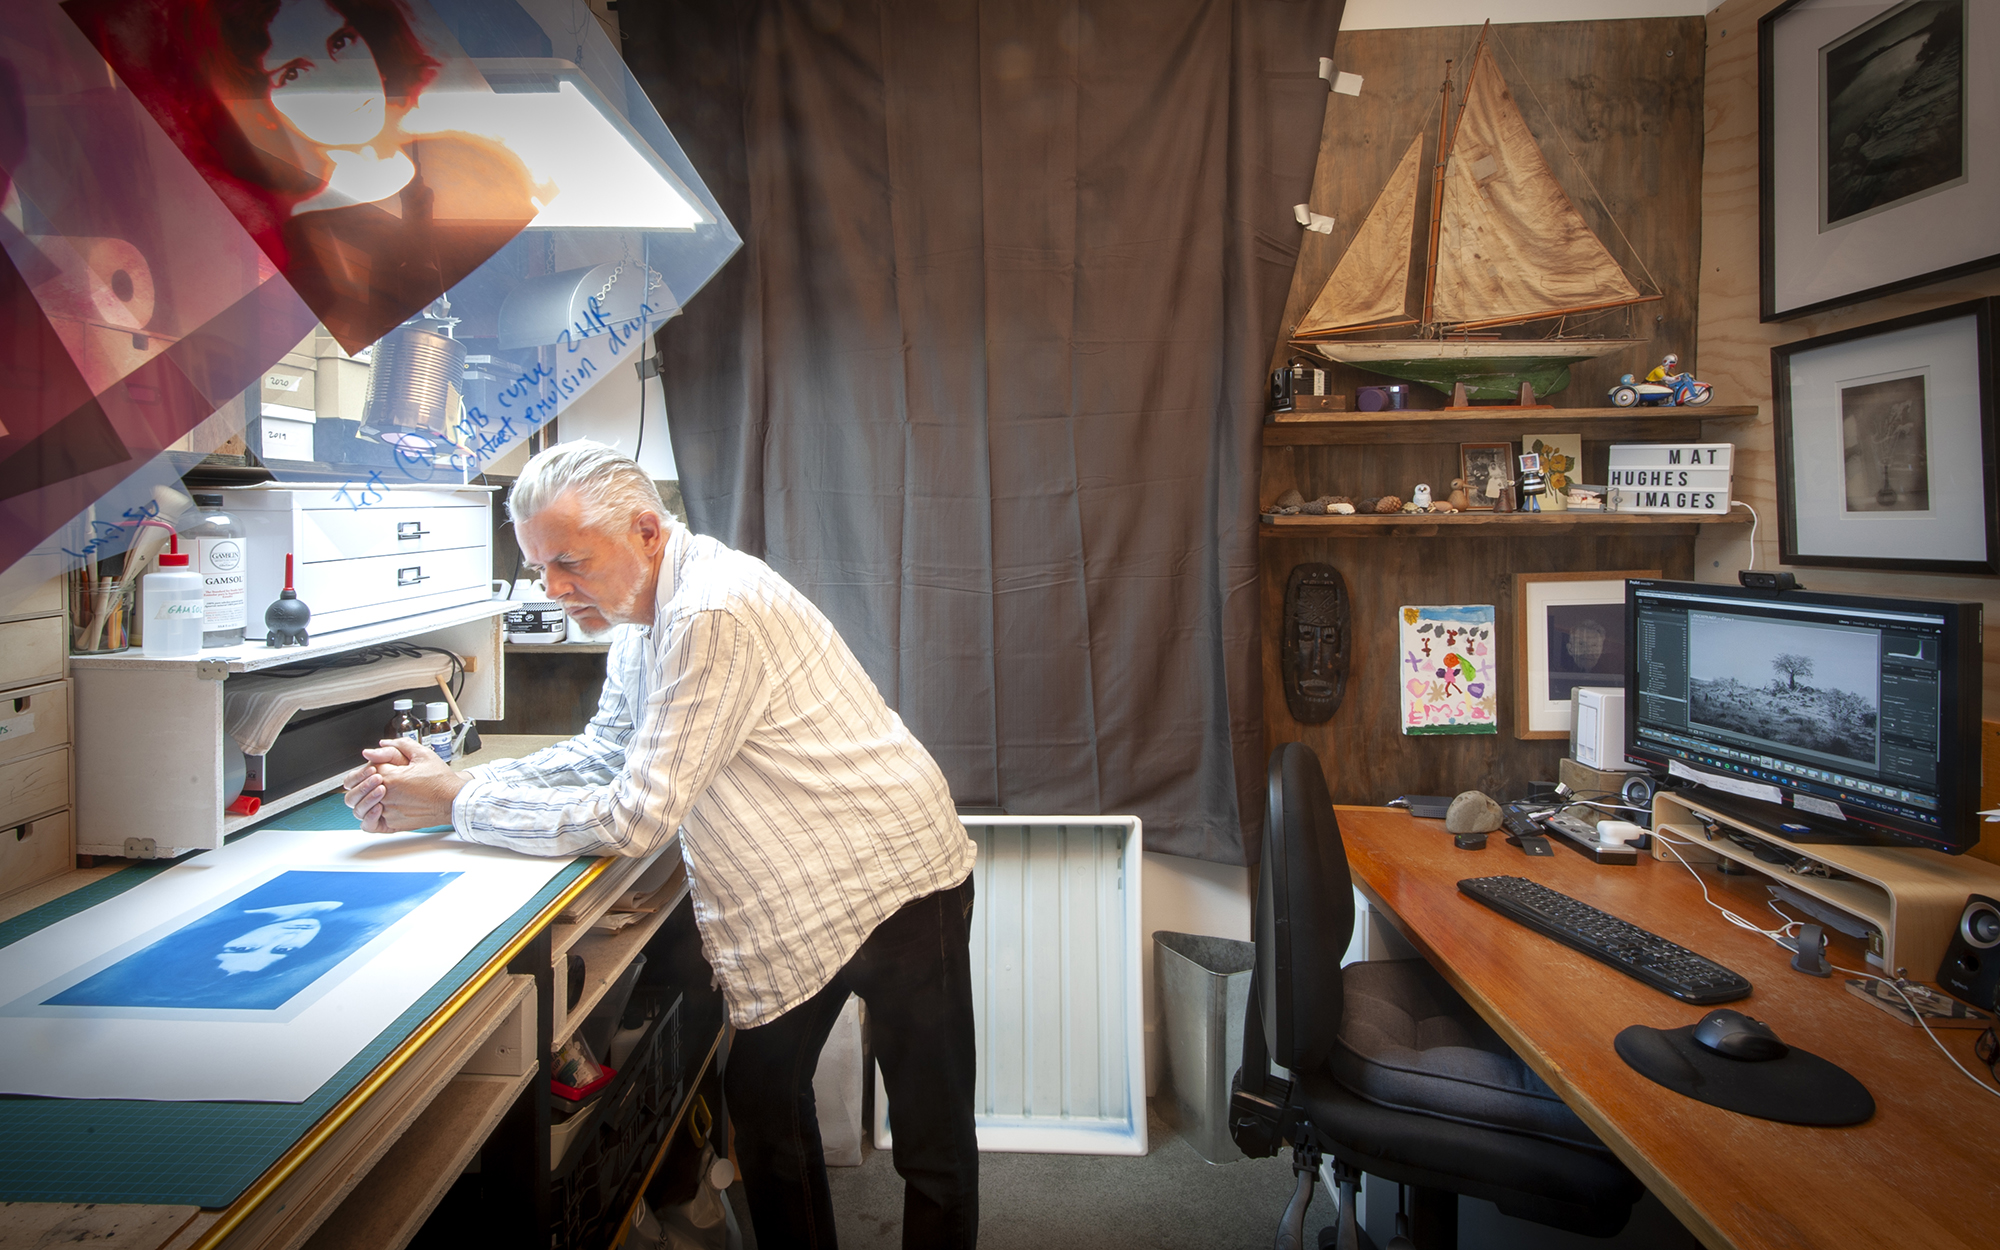
My dim-room is 3m x 3m with a single window at one end and a door directly opposite, leaving two walls blank. The walls are made of plastered brick. The space could accurately be described as small and perfectly square.
Having ruled out the traditional darkroom, I began by thinking about the limited floor area and made a list of equipment. It became obvious that storage and a large workbench were the main considerations. Storage for the various camera kits and printing paraphernalia and a large workbench because sheets of paper are the stock in trade of the printmaker. There simply was no alternative but to fill each of the four walls up to ceiling height with useable space.
Broadly speaking, I separated the space into two halves, galley style, with workbench (for printing & storage) and computer side for the digital preparation.

Workbench & storage
With limited skill and a toolbelt full of colourful language, I constructed a basic timber workbench 97cm high, taller than average and 94cm deep. The depth allowed space for a row of Ikea drawers for everyday tools leaving enough bench space to work on prints. The bench top was simply an uncut sheet of yellow tongue, resilient enough to trim or cut on.
I calculated the work bench height to allow for the main bulk storage. Most equipment is stored in standard lidded plastic storage crates. Heavy camera equipment sits on the bottom shelf. Lighter equipment and tools are stored above, along with boxes of paper and chemicals labelled according to the individual printing process. Just above these, I added a couple of felt lined letterbox shaped shelves. I use these for storing matte boards, bonded prints and print packaging materials, all within easy reach.
My UV exposure box being one of the principal tools of the trade, it sits on the workbench taking up a third of the benchtop area. This (and the printer) dictates the maximum print size which in most cases for historical processes is around 20×24. A vital piece of planning information.
Readymade furniture would have resulted in far too much dead space, so I commissioned a local carpenter to build a plywood shelving unit, full room width, up to ceiling height directly over the workbench.
The shelf heights were again carefully calculated. The smallest shelf near the ceiling holds small books while the middle shelf has space for oversized hardback reference books and the bottom largest shelf is directly over the workbench. This holds boxes of finished prints, pads of velum, mylar and watercolour paper and boxes of processed film negatives, again, all within easy reach.

Lighting (subdued)
The room has one single window with plantation shutters and is mostly in shade. In the beginning I installed an additional roller blind. As time progressed and the price of platinum rag paper increased, so did my irrational fear of paper fogging from ambient light so I hung a domestic blackout curtain over the window.
Everyone will be familiar with the slither of light that creeps under a closed door. This type of ambient light, so long as not direct sunlight, is the subdued light that I previously spoke of. I would go as far to say that the door is often left ajar when I’m paper coating and is only closed for the 60 minutes when paper is drying. Any gap under the door is easily blocked with an old piece of cardboard.
The acid test in recent weeks has been with orthochromatic film, which is tray processed without any fogging. Although, for this the door is firmly shut and the cardboard is in place.
Lighting (additional)
The dim-room uses a few different light sources. A daylight balanced LED panel projects over workbench for print viewing and general illumination while pottering about. The obligatory Ilford darkroom safelight hangs near the work bench and is used most of the time as room illumination when printing with iron based processes or orthochromatic work and is obviously also safe for silver gelatin work.
If I`m coating paper, I`ll also use a handheld kids light or a low wattage clip light positioned so that I can see the reflection of wet chemicals on the paper to ensure even coating. Unlike some folk, I coat paper under fairly low light conditions.
And lastly, taking some inspiration from a film clip of Edward Weston in his darkroom, I have a bulb in a baked bean can suspended over the workbench that I have used for the occasional silver gelatin paper negative contact print. Its rudimentary and could do with some improvement, but it’s a fun reminder that things needn’t be complicated.
Atmosphere / Salon-style gallery
For paper coating purposes, a digital monitor reads the rooms temperature and humidity. I might occasionally need to boost humidity especially during winter months as this can affect the print contrast if done prior to coating the paper with light sensitive emulsion. For a space this small one of those steam vaporiser units used for snotty children does the job in two minutes flat.
Melbourne brick can be notoriously hard and extremely difficult to drill. Not wishing to lose out on space, I lined the three remaining walls with sheets of structural ply. This has given me valuable room on which to display both my own work and that of other artists I find inspiring. The pictures are hung salon-style.

Digital processing
The other side of the room is given over to the computer with its calibrated monitor. I picked up a huge old desk from the 1970`s. Modern desks are simply not deep enough. With a depth of 93cm the monitor is a comfortable viewing distance. Data is stored to a NAS drive which provides continuous automatic backup.
Film negatives are digitized with an Epson V700 flatbed scanner. I wet scan, mostly 4×5 & 5×7. The scanner has been calibrated for use with a film holder from Better Scanning over in the United States. Exported digital negatives are printed to an Epson P600 which sits squished into the space near the door.
A washing line bisects the room at head height designed to garrotte the uninvited. Digital negatives need to be aired for several days after being printed to allow them to release gas (I kid you not). This is called out-gassing.

Tray development
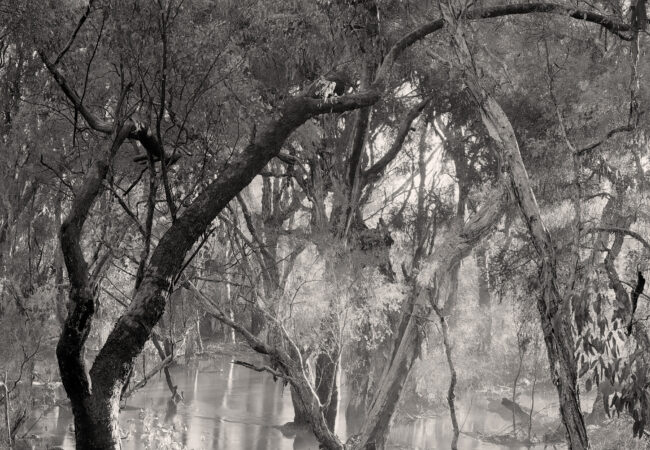
I mentioned earlier that 20×24 is the maximum paper size my UV exposure box can take. The astute readers among you will wonder how on earth I am able to wet develop 20×24 prints using say, the Van Dyke Brown process in such a small room given that a minimum of five 20×24 trays are needed, not including a sixth tray for toning? I`m afraid the simple answer is that I just don`t have the space.
In order to tray develop larger than 5×7, I need to move my trays to the kitchen & living room. So long as the exposed paper is dunked quickly, fogging is not an issue. A piece of cardboard over the tray does the job.
My studio
The dim-room is visually a very different beast to the traditional darkroom albeit with some overlapping similarities and purposes. It can be seen as an understated workplace unless you have some prior knowledge of its intended function.
There is no centrepiece enlarger that defines the room’s purpose. There are no obvious methodical zones for wet and dry activities. Nor is there any tell tail clue that this is a controlled environment designed for serious photomechanical printmaking.
I think of my workspace as a studio. I seldom use the expression dim-room. I cannot speak for others, but the small size means that my studio is always a complete and utter shambles with several concurrent projects vying for space, not to mention the piles of scribbled notes and paper samples lying around.
Despite the mess I handle 13×18 negatives on a daily basis and the nemesis of dust that is the constant curse for many printers just doesn`t exist for me.
If I were to make any improvements, it would simply be to train myself to put things away. I might also build a better work bench, one absolutely level for precision emulsion pouring and paper coating, that`s about it or perhaps with an inlaid metal plate for using magnetic strips… hmm now that’s an idea!


That is an interesting backstory to your dim room /studio Matt. Very compact and well thought out.
The digital side or studio, looks very well set up with computer, printer, scanner and NAS drive. I don’t know about the film holders from Better Scanning. Doesn’t the Epson V700 flatbed scanner come with 5×4 film holders? Mine did. Otrare you referring to a 5×7 film holder?
Thanks Gary,
Yes, indeed the Epson does come with its own film holders which in most cases are perfectly adequate for the smaller sized film.
Where the holder from Better Scanning has the edge is that it includes a glass support that the film lies on ensuring it is completely flat and does not droop which can happen with the Epson holders. The holder also has adjustable feet which move the holder up or down by micro amounts. This allows the scanner to be calibrated for the exact point of vertical focus for the sharpest scan.
The holder allows the operator to make bespoke sized film masks, so no problem scanning something like half plate which Epson would never make a holder for.
Additionally, the glass support allows for ‘wet scan’. This is when you make a film sandwich meaning that you wet the glass with mineral oil and lay the negative directly onto the wet glass, the oil ensures full contact, then the top of the negative is also wetted, and a piece of Mylar completes the sandwich. Glass>oil>film>oil>Mylar
Some say the jury is out with wet scanning, but it works for me. Yes, it can be slightly messy and then there’s air bubbles but hey it’s what we do!
Best Mat