Fisherman’s Hut, Coorong, 2017. Platinum‒palladium print My interest in the Coorong and…
When it All Began – Andy Cross
I guess it was in my DNA as I can always remember being interested in how photos were made. My mother recalls, at the age of 6, asking her if it was a special kind of paper that had to be used to make photos. But I can easily recall when my photographic journey really began. It was second year of high school age 14. The school had a darkroom which was used for storage and never used for its intended purpose. That was until a new teacher came on the scene who was pretty well versed in what went on in darkrooms and eventually got the go ahead to set up the equipment and started teaching a group of students who had access to a camera and were interested in learning.
I thought this was great as I was finally going to find out what happened to those films my parents handed to the chemist then picked up a week later as negatives and prints. At first I used the families box brownie 6×7 camera. Eventually I saved enough to buy a second hand Pentax K1000. It came with an 80mm~200mm Sigma lens as well as a normal lens.
I shot images for the school newspaper and cut my teeth on motor sport photography, particularly drag racing which I had access to through my school friends fathers. But I started to become bored with that and started looking for other subject material. That’s when I discovered still life and landscape photography. By the time I finished Uni and started work in optical engineering I upgraded to a Nikon for which there was an endless array of accessories to make a photographers life easier.
Optics taught me a great deal about light and it was around my final year I purchased a couple of hot lights. This was far more convenient than available light and a lot more predictable. In later years I added floor pack strobes to the arsenal as well.
It wasn’t long before I had built a darkroom under my parents’ house and purchased the necessary equipment to process and print B&W negatives. By the mid-eighties I had expanded my interests into colour photography. Mostly C-41 colour negatives and transparencies printed on chromogenic colour paper. This included the use of some of the direct positive colour papers like Kodak Ektachrome and Cibachrome paper. These materials allowed me to print directly from colour slides. To accommodate this the darkroom was expanded and other refinements like hepa filtered air conditioning was added.
Around this time I also discovered medium format cameras. Those Hassle things were way too expensive but, as I discovered, Mamiya’s and their Secor lenses were a close rival. The contact sheets were a lot easier to read and the use of the camera slowed you down and made you think more about the composition.
By this time I thought I would like to obtain a more formal education in photography and produced a folio sufficiently good enough to gain entry to the Queensland College of Art at the Griffith University.
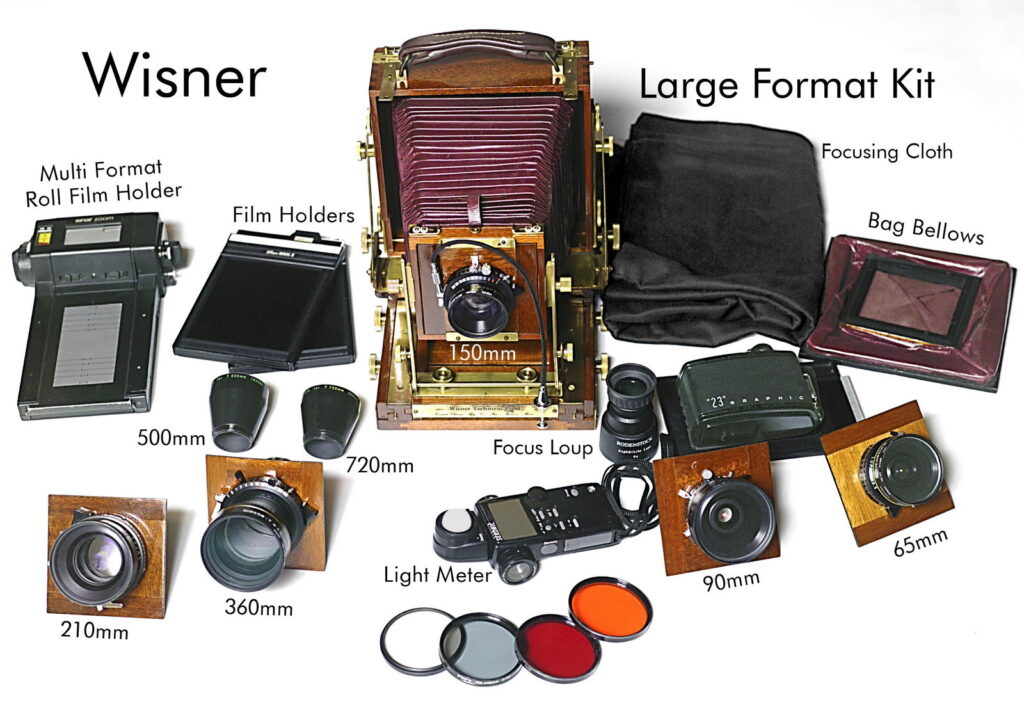
Although this four year part time degree did teach many technical skills its main focus was on how to take better photographs. It also put some emphasis on the politics of the camera and why you take the pictures. During my time at Griffith was where I also purchased my first 4×5 monorail camera. Many of the studio assignments involved large format work. A Wisner folding field camera soon followed allowing me to engage in large format landscape photography with greater ease.
It was during my second year when studying the history of photography , which was a core subject , I made several interesting discoveries. One of the most significant was the reason that most of the images in fine art museums, national and state galleries, archives and private photographic collections throughout the world were monochrome of some sort. All colour photography without exception was fugitive and most but not all colour printing processes were as well.
I had to look up the meaning of fugitive but it is a term that image conservationists use to describe documents of any sort that will fade, change colour or migrate all by themselves regardless of how they are displayed, stored or maintained. All that can be done is slow down the inevitable. It didn’t make any sense to me continuing to reproduce my work using any medium that was going to self-destruct. With further research I also discovered there was a big difference between a photograph and a print.
To be classified as being a photograph meant the substrate supporting the image had to have been sensitive to light at some stage of its life even if it was just UV light. To be classified as a print meant that the substrate supporting the image had never been sensitive to any form of light. Consequently photographers often use the incorrect term when talking about platinum or silver gelatin prints. There actually photographs. Images made by printing processes such as lithography, screen printing and inkjet are in fact prints and all use organic dyes, inks or pigments and by default are fugitive.
This puzzled me because you could still visit institutions like those mentioned above and still see colour prints made from photographs that hadn’t displayed any deterioration. I was told those images were probably Fresson, carbro, carbon or dye transfer prints. Those processes used inorganic pigments or imbibed dyes and met or exceeded the image stability requirements to be classified as non-fugitive. I was told that no one uses those processes now because the materials are no longer available. Even if they were no one on the faculty would know how to make them or be able to tell you who could. The learning curve is so steep it will be years before you make your first print.
Unfortunately they were correct on all counts apart from the materials not being available. So in a puff of smoke my ambitions of reproducing some of the colour work for my graduation folio in dye transfer was gone. Shortly after I joined a group called the New Pictoralists Society that were based in Vancouver Canada. They were a group that specialized in the preservation and practice of non-silver print making. ( Closed down in 2010 )
It was through this group I made valuable contacts for material supplies, equipment and most of all help and advice on how to carry out the work. My first contact was the late Dr Morry Bard who ran a dye transfer lab in Pompano Beach Fl.
He not only ran a lab but also developed a new set of dyes he called BEE dyes, short for Bard Experimental Enterprises, for the process. His advice was to learn how to print Cibachrome correctly before tackling DT. The masking processes were very similar and required additive printing. These materials were a lot less expensive to wreck than DT materials. The second stage of learning to make DT prints was to colour separate. I would take a colour transparency and make the necessary silver masks then make enlarged colour separations on a suitable film. These colour separations were then contact printed onto RA-4 paper. When I had that process under my belt it was time to visit the USA where there were still courses being run on dye transfer.
The various masking techniques I had to learn were also invaluable in virtually eliminating the need to adopt complex dodging and burning in schemes for gelatin silver printing. It is a very effective method of taming a difficult to print negative. But one that cannot be done by trial and error.
Several trips were made over a period of four years as I gained more knowledge. I owe a great deal to my mentors like Jim Bones, Bob Pace, Robert DeSantis, Morry Bard and Tom Rankin. Sadly most of whom have now passed.
The workflow I adopted was to make the best dye transfer prints I could. From these I would make a selection which images I would reproduce in one of the pigment printing processes like Fresson, Carbro, Carbon or Gum Bichromate using inorganic pigments. After more research I settled on the carbon or carbro process. Although both were finicky, materials were still available and courses were still being run on a limited basis.
The NPS was helpful in this regard by introducing me to ( Late ) Dr Robert Green at Gallery 614 in Fort Wayne Indiana. He was the person responsible for reintroducing the carbro and carbon processes into north America. He was also getting pigments made by the Hanfstaengl Co in Germany in sufficient quantity to become the US distributor.
First I had to get a handle on the monochrome version. Because bromide paper was cheaper than large sizes of film I learned the carbro process first. A far more delicate process compared to the carbon. However done correctly the two types of print are virtually indistinguishable from one another. Later in order to make carbon prints larger than 8×10 I used my skills from DT to make enlarged negatives from colour transparencies for the carbon process. How they ever used it or the carbro process as a method of commercially producing colour prints in the advertising industry boggles the mind.
From there I returned to gallery 614 to learn the tri-colour version of carbon. This took several trips as I learned to refine the process. Even today I am not confident that I will have a good day in the darkroom when using this process. By comparison the dye transfer process is far more predictable.
Kodak discontinued manufacturing all materials for dye transfer in 1993. Through the dye transfer groups we learned work arounds and managed to obtain matrix film from other sources. I still have a sufficient quantity of materials to make dye transfer prints for many years to come.
Although you can make your own pigments for the carbon printing process, (with no manufacturer now making them at all means it is now a necessity), I still have a sufficient supply of Hanfstaengl, Polaroid, Berger and autotype pigments to keep me printing for years. Once I have used them I will give up carbon printing. The reason is repeatability. I remember something a lecturer I had at uni once told the class. If there is one thing human beings are very good at – and that’s not being able to do the same thing twice – even when they think they have.
As the late Dr Green and I found out making pigment sheets wasn’t difficult. But making 100 sheets the same in that they that sensitize to the same speed and contrast was. Unless mechanization was employed. This became even more problematic for tri-colour because three separate colours were involved. Coating machines are expensive and to justify the cost you need to sell your products. I had no intention of becoming a pigment manufacturer. I will in all probability switch to polymer photogravure using ink based pigments that use the same inorganic compounds as colourants when I run out of pigments.
In this digital age less and less people are even printing out their happy snaps. When the files become corrupted many visual records of the communities we lived in and our way of life will be lost. People will still be able to view images of their great great grand parents or even further back. But from the late 1980’s there will be a void. Perhaps by using these processes and leaving my work to the right organizations I might correct this issue a little.
So there you have it in brief the journey my photography and interests in the sciences have taken me. To finish this piece I will quote the founder of the Qld College of Arts, the late John Mackay. As he once said. Painting, drawing, photography, sculpture, etc is and will always be an uncomfortable marriage between art and science.
PS Since I wrote this article have have made a new friend Kyle. He is an engineer and has told me making a coating machine for pigments similar to the slot coater made by J Browning at Digital Mask in the USA need not break the bank. So watch this space to see what developes.
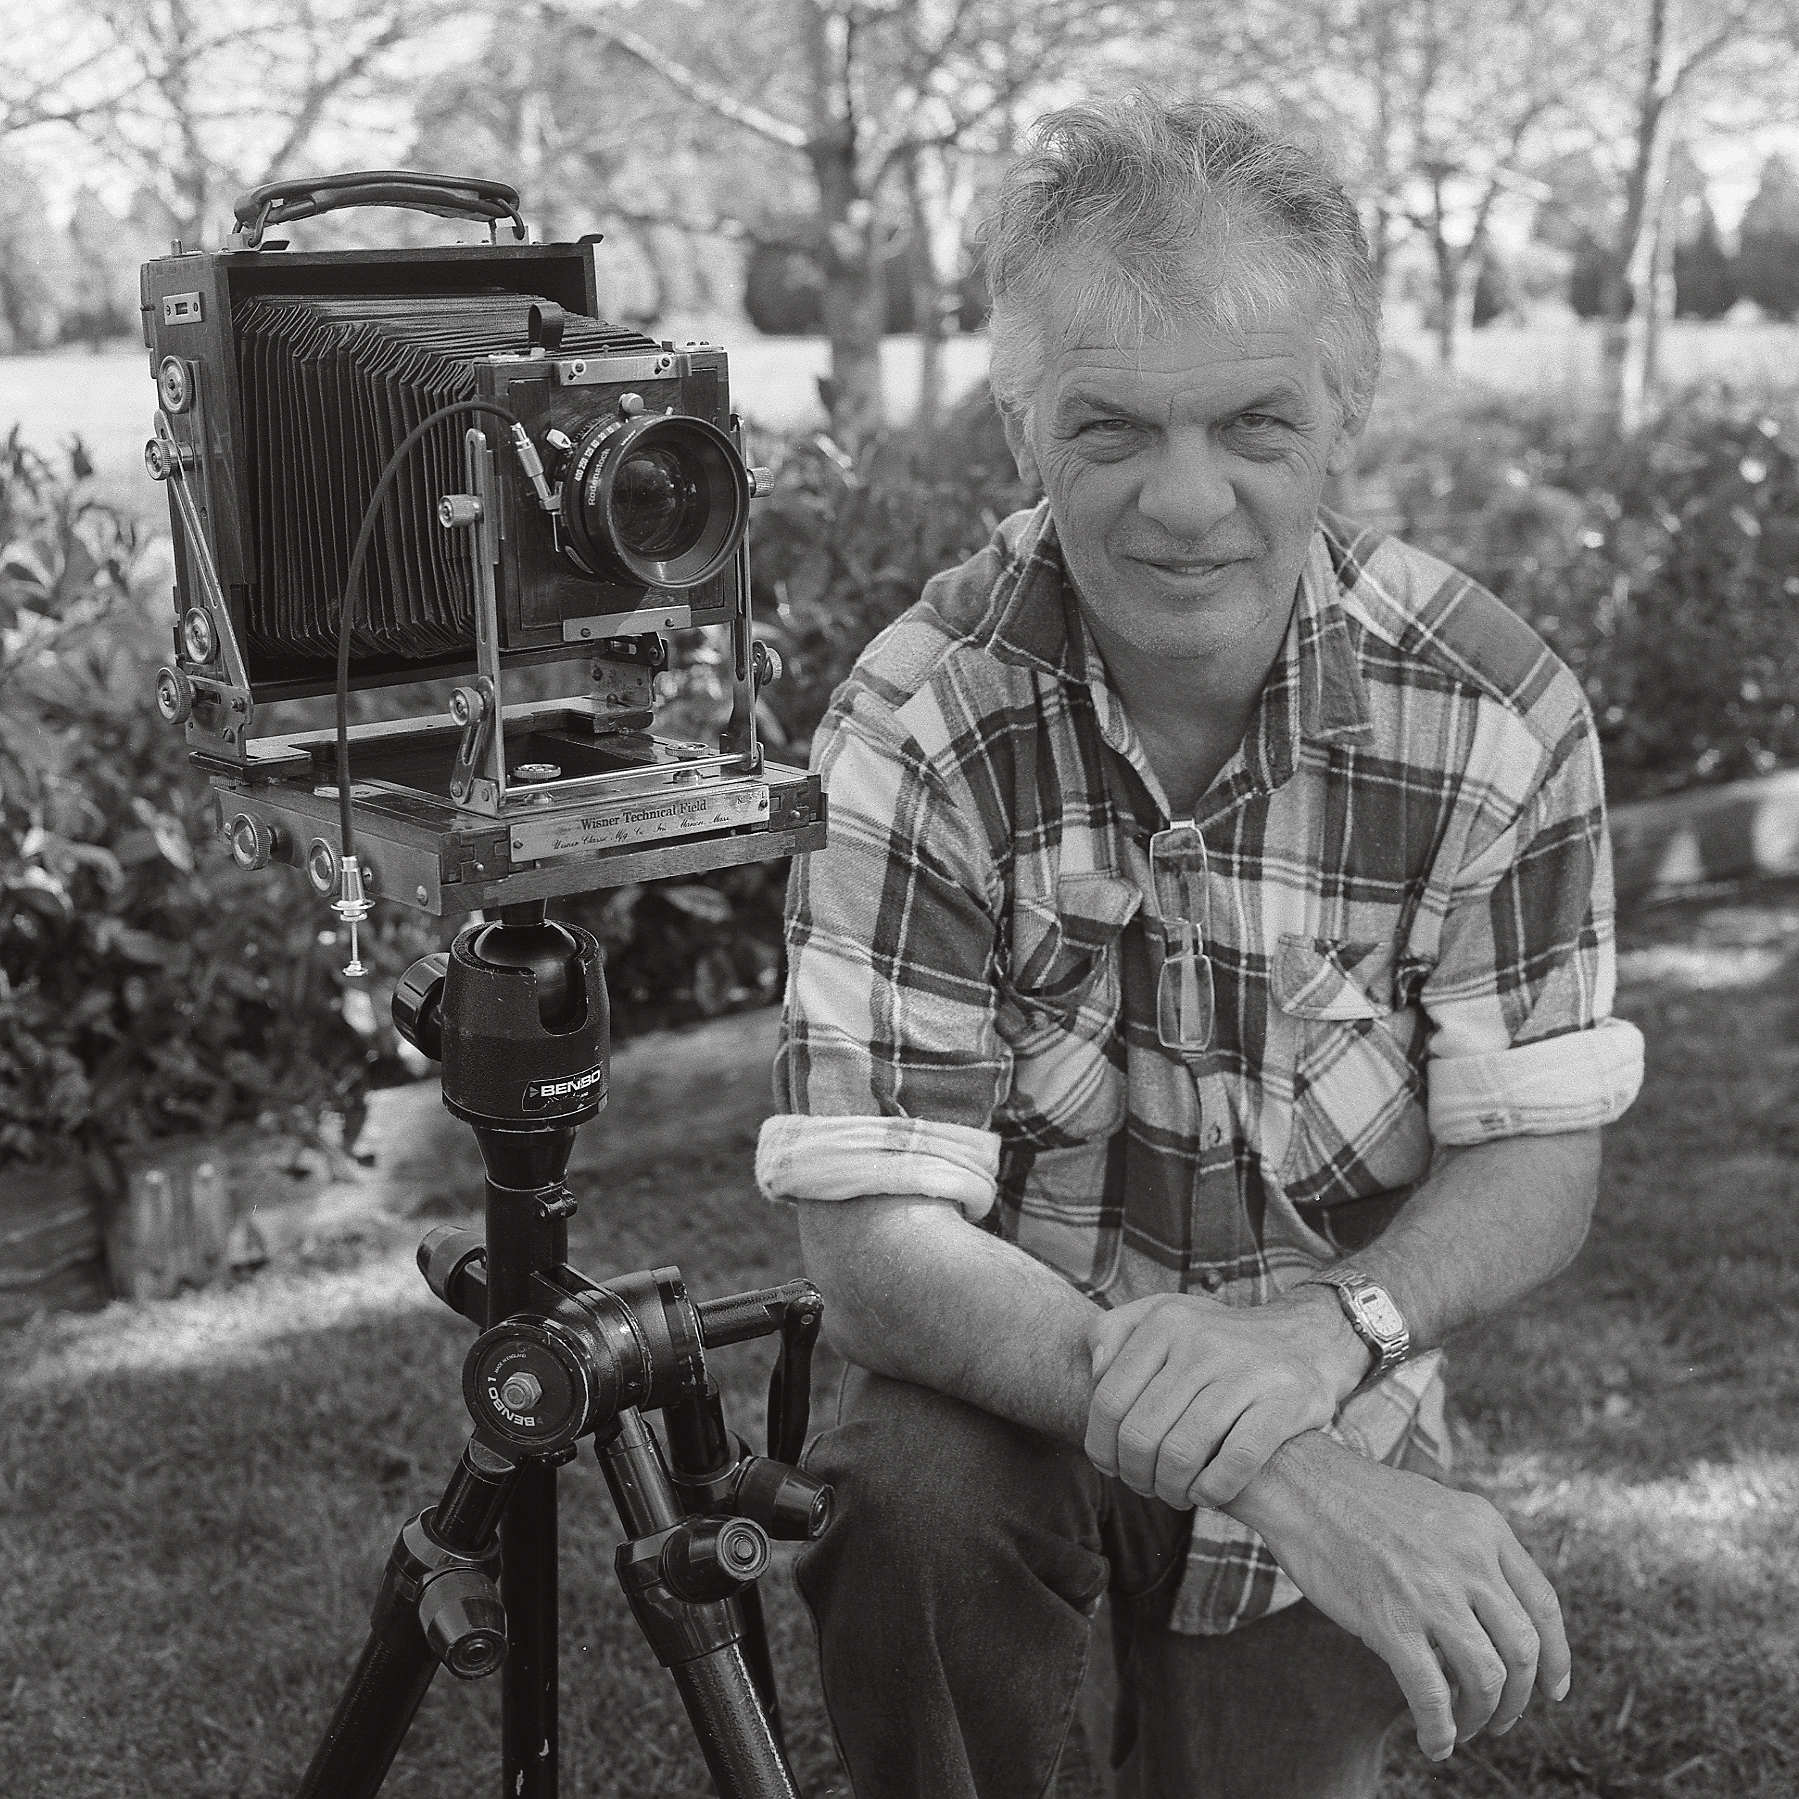
Photograph above: Andy Cross with 4×5 camera. 30 x 30 cm silver gelatin print 2011. David Tatnall.
Next Post: Submissions now open for online exhibition
Previous Post: Exhibition: The Female Gaze – Melbourne Camera Club