
A smaller view – Murray White
It was about 10 or 12 years ago that I traded my previous roll film camera and associated gear on a Mamiya 7 kit. At the time I considered the pros and cons of I think every possible contender for my purposes, and the lightweight Mamiya with its sharp interchangeable lenses and my favourite aspect ratio (6×7) won the fight. It was a beautiful camera to use, super reliable in my experience, and came very close to being a ‘forever’ camera.
Fast forward to today and little has changed in that sentiment over time, but in recent years the appreciation of a 4×5 view camera has exposed a couple of shortcomings in the Mamiya’s performance. Well perhaps that criticism is a bit misplaced, as the advantages (and disadvantages) of a view camera are inherent to the design; in the same way as the Mamiya’s strengths and weaknesses are inherent to its design. What has changed is my demands of the system.
For a number of years, I have found the intimate landscape to hold more appeal than the broader view, so movements, especially front tilt and to a lesser extent front rise, together with a closer focusing capacity were very appealing. The ability to gather subjects both near and far together on the ground glass yet still use a mid-range aperture became routine on the 4×5 Ebony but impossible with the Mamiya. Compositional choices on roll film became increasingly compromised. I would regularly be stopping the M7 down to the minimum aperture (with associated diffraction issues), and in many cases still not achieve my desired depth of field anyway.
On the other hand, I am a big fan of roll film and use on average four rolls of it for every 10 sheets exposed on 4×5, so about four times as many images are made in medium format as they are in large format. Roll film is much lighter and smaller to carry in the pack, more convenient in dusty or rainy conditions, and still meaty enough for a reasonable sized enlargement. If only I could use it in a view camera….. Hmmm.
Of course there are options here, and after a bit of to-ing and fro-ing and considering the candidates for such an arrangement, I retired the Mamiya and settled on an Ebony SW23. For a view camera it is a super lightweight (1.3 kg, and only slightly heavier than the M7 fitted with an 80mm lens). It has more movements than my 4×5 Ebony, and packs away just a little smaller too. Its non-folding design and rigid rear standard makes it ready to use straight out of the bag, and with a Horseman Angle Finder attached it is not much more onerous to set up than the Mamiya (which lived on a tripod anyway).


I purchased a second set of lenses for this camera: a 58mm, 100mm and 180mm, which gives me a similar selection to my other view camera (and not unlike the range I had with the Mamiya for that matter). With a short bellows draw optimised for wide angle lenses, the SW23 functions in a very similar way to my RSW45 Ebony; the180 sits in a top-hat extension, while the 58 works comfortably on a flat board and the 100 has a nice feel for normal use. The generous image circle of the 180 is probably nice to have using tilt on a top hat board, and it together with the 58 could also be called into use on my 4×5 if necessary.
In terms of redundancy, if something should fail when we are travelling to remote areas, the ability to swap lenses between kits may prove useful. I have also chosen to get two 6×7 roll film backs and a larger Graflock 6×7 back that I can use on the 4×5 Ebony if needed. I carry two lightmeters (been caught out before!), and two darkcloths (well it gets fairly bright in Central Australia…), and a spare ground glass for each camera.
I have been getting to know this camera over the last fortnight, and the more I use it, the more convinced I am of its capability for my purposes. I have clearly marked up the ground glass to my 6×7 film format, and while the focus doesn’t ‘snap’ quite as crisply as the larger screen 4×5 appears to, it is not objectionable, even to my ageing eyes. In fact with the magnified angle finder, I find the screen reasonably bright, the image clear, and I haven’t needed to use a loupe as yet. Prescription glasses are not ideal for this finder however, and I have a +3-dioptre lens insert coming which will allow me to focus directly and shield indirect light from the viewfinder.
Mounting the roll film back on the SW23 is simple with its hinge-background glass readily swinging out of the way. It is almost as easy as inserting a double dark into the large format Ebony, and more convenient than juggling a 4×5 ground glass while trying to attach a Graflock back to the bigger camera.
My limited experience in the field has been that this kit is not noticeably lighter than my 4×5 with a few double darks on board, but there are some other advantages in any case. For example, extra film effectively weighs nothing, dusty, wet or windy days are all just a little more manageable, while there is an obvious cost saving per developed negative. A more subtle benefit is the perceived freedom to make an experimental image, where I may not be prepared to burn another big sheet on a composition with less than certain attributes.
The Horseman angle finder not only makes actual focusing easier, its rotating lens body permits operation at any angle that is comfortable – a feature that I have found quite useful even at this early stage. I am so impressed with this device I have modified its base and screwed it directly to the Ebony’s ground glass frame. I now only need to clip the body onto the base instead of unclipping the mini Graflock and now use the Ebony’s brighter ground glass rather than the Horseman’s slightly cloudier screen.
On the downside, the SW23’s front tilt is restricted to 20 degrees and it is a limit that I have already found more than once. Given that tilt capability was one of my prime reasons for choosing a medium format view camera, I will modify or make new guides to provide a little more range, as image circle restrictions are not really an issue.
Of course, the obvious question that needs to be answered about this camera is whether it has improved the quality of my medium format negatives. I think the correct response is yes (based on now being free to choose more friendly apertures and being able to focus more closely), but I am sure time will be a better judge of that than my immediate impressions. And in a move that may have muddied the waters a little, I have complicated that assessment by changing two (or actually three) aspects of the process simultaneously!
Yes, I have a new camera and lenses, but I have also chosen to use Ilford Pan F+ film developed in Perceptol rather than my usual Ilford FP4+ developed in LC29. I am very familiar with the latter combination (which for now I will continue to use with 4×5), but I was keen to try an alternative for roll film in a bid to maximise the quality of the smaller negative, without resorting to a potentially less forgiving film/developer process.
Much has been written about various film/developer combinations by others on various forums that attempt to quantify what is achievable. I have to confess that from what I have read in sometimes contradictory reviews I am less than convinced of some optimal pairing for any photographic genre or purpose, and the reality of any result may effectively boil down to personal preferences. I have no burning desire to inspect grain structures under a microscope let alone test the countless variations of process available but did think it may be useful to at least try another combination just out of interest.
The images accompanying this piece are all scans of 8×10 prints made from 6×7 negatives and exposed through the SW23 in the last two weeks. In a trip to the You Yangs and then Great Otway NP, I exposed four rolls of film and processed them together in a rotary processor. I rated the Pan F+ at ISO32 and underdeveloped according to Ilford’s recommendations with diluted Perceptol (1 + 3) in an attempt to tame the inherent contrast of this film.
As it turned out I may have overcompensated for this characteristic and will need to reassess the process on future outings. Having said that, all of the negatives were printable, and I have made a number of 12×16 enlargements that exhibit very fine grain (almost invisible to me) and tonal qualities that rival the best I have got out of FP4+. An interesting experience all round!

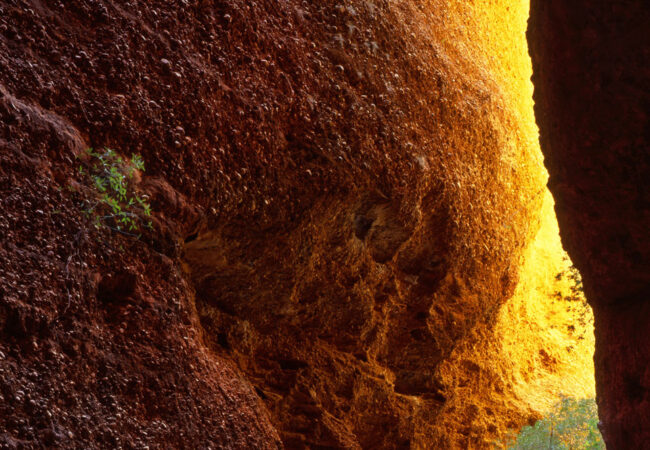
TRACKS This print is a good example of a subject I would not have been able to manage as effectively with the Mamiya 7. With front tilt on the SW23 I can maintain depth of field throughout and still use a medium range aperture; with the M7 I was routinely stopped right down with associated diffraction issues. I found the minimum focusing capability of the Mamiya to be a little limiting in some situations too.


Peter McDonalds review of the Shen Hao 6×17 roll film view camera can be seen here.


Murray, thank you, a very interesting article. Pan F film is very contrasty. For a much finer grain and much better tonality try using FP4 developed in PMK. With pyrogallol in PMK form you will lose some speed 125 ISO to 80 ISO, but the tonality and sharpness you will gain far out ways that. Well worth trying.
Thanks very much David. You are not the first to suggest PMK developer, and I do like FP4 for my 4X5 negs. I’ll give it a go!
Murray, a very nice piece of kit. I do like the fixed rear standard, and given that rear movements are generally less used than front, the rigidity it provides is to be preferred. The only issue for me would be the lack of bellows extension the folder would have but then, as you said, a top hat lensboard solves that problem. The results you are getting are impressive. Would you use a 6×9 format back?
Thankyou Peter, yes a longer bellows draw would have been nice and the Ebony 23S or SW23S hybrid are capable of that, with a couple of more movements (and probably a less rigid back) but they weigh a little more so I guess everything is a compromise, as I discovered with the Mamiya. In terms of the format, a very nice 6X9 RFB came with the camera and I think it is an excellent choice for horizontal compositions, but I find the 6X7 (or 4X5) aspect ratio more classic in its proportions for a vertical shot. Very much a personal opinion, but I do take considerably more ‘portrait’ images than ‘landscape’ ones, if that makes sense coming from a landscape enthusiast!
Interesting side step back to 67, l look forward to seeing it in action.
Yes it is interesting Shane, and probably not without its share of challenges. I haven’t abandoned 4X5 by any means, but I think on long day walks (like say Carnarvon Gorge in Queensland for example), I would probably grab this camera because I find it difficult to forecast how many subjects I may find and therefor how much film I may use. I could use two or three sheets (maybe a few more) and the 4X5 would be fantastic, but what if I find 30? It’s not likely I guess, but on a 20 km walk I do make a lot of stops…..