The E6 Road – Andy Cross
As many readers of this web site know photographers are notorious for abbreviating things. Mention the term E6 and most photographers will relate it to colour transparency film or colour slides. It’s a miracle the film is still in production these days especially in formats larger than 35mm because practically no one puts together slide shows any more. But there are some good reasons for using it. First of all, for analogue photographers you don’t need to print the films in order to interpret the image as you do with C-41 colour negatives.
They are also easier to scan because you can directly compare the colour balance, density range and colour saturation of the image on the monitor with that of the original. But for the most part they are a lot more versatile for people practicing various colour assembly printing processes like Gum Bichromate, Carbro, Carbon and Dye transfer. All these processes require the making of colour separation negatives. Working from a first order result which is a positive reduces the necessity to make inter-positives and large sheets of panchromatic film are expensive. Many of these processes cannot be done working from colour negatives anyway because there is no work around for the lack of materials. People working with other alternative monochrome processes benefit from working with colour transparencies for the same reason.
The B&W silver gelatin printer can also benefit from shooting a colour transparency film. When the window of opportunity is small to get the shot in the can, reach for the magazine loaded with E6 film. The window of opportunity can be the diffusing cloud cover isn’t going to last long, or the wind has stopped blowing or perhaps all the people are now out of the shot. In situations like that I don’t mess about with deciding on what filtration to use, zone placement or should I normally process or pull. I just grab the colour transparency film and bracket some shots.
The big question is why do that when the intended image is to be a B&W. There is 3 times the amount of information in a colour film than there is in a B&W neg. You can make all the decisions on how to make the negative from the transparency later in the darkroom. You can contact print or enlarge the image on to any B&W film you choose. Use any filtration you want, make silver masks if needed and process the film as you like. This second order result will be a B&W negative and will not show any generation loss in the final print.
However, before you can do this you have to be able to optimally expose, colour balance and process E6 films and this is where things can go pear shaped. Most B&W photographers who do their own printing will optimize their exposures by finding a personal speed point for their chosen film and use that instead of the speed the manufacturers print on the box. This is usually necessary because the way the manufacturers test to derive the speed has little to do with the way photographers use the film in a pictorial sense. From there we test to find a personal development time, so the highlights don’t become too dense.
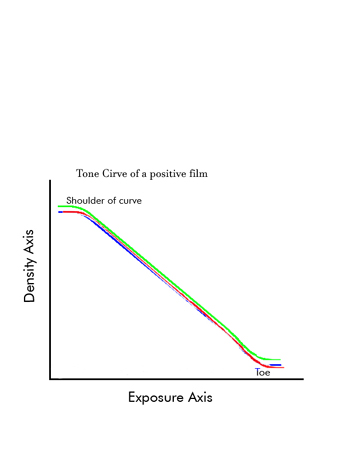
However, you never hear about photographers finding a personal film speed for colour transparency film. The rule seems to be use the box speed and bracket like hell. You can’t push or pull anyway so what’s the point. Well, the fact is you can push and pull colour films but not to the same extent as you can with B&W. In fact because of the shape of the tone curve of E6 films push or pull processing half a stop will have the effect of about two thirds of a stop sometimes more than if it were a B&W negative film. So, finding a personal film speed is the first task I perform which will also reduce the waste by how much you have to bracket to optimize the exposure.
The procedure is essentially the same one I use for B&W negative film but because it is reversal film, in that the area of least exposure creates the greatest density, the procedure is reverse. I photograph an out of focus 18% reflective grey card, so the image fills the frame. I bracket a series of exposures over the metered reading in one third stop increments then normally process the film. In B&W I use the frame 0.2 log units of opacity over the film base plus fog value. This usually results in a personal film speed of half a stop to one stop less speed than is marked on the box.
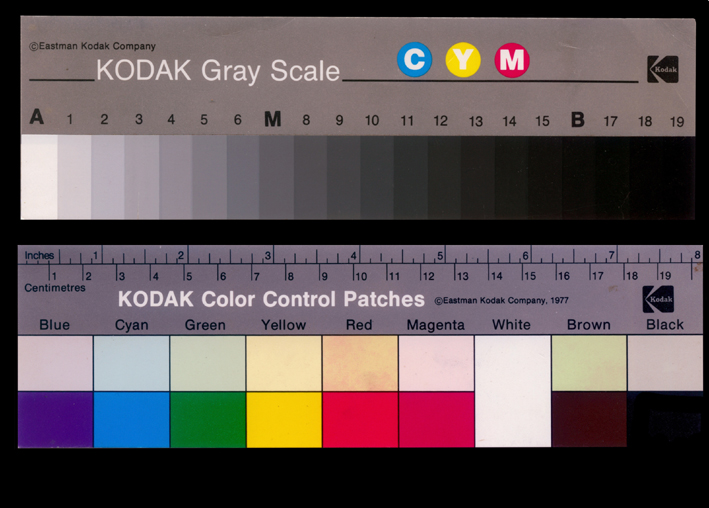
With E6 films the film base fog is about the same but I use a film speed that produces a density of 0.3 to 0.35 log units of opacity denser than base fog. The reason for this is because any thinner than that contains very little printable or scan-able information in the highlights. Armed with a personal film speed I then photograph an accurately focused colour patch chart and greyscale. I consider this essential because it only needs a slight variation in the processing to alter the overall colour balance. It all revolves around the fact that colour (which has two components hue and saturation) is contrast dependent but contrast is not colour dependent. For example. If you alter the gamma of development i.e. push or pull process, then the contrast will increase or decrease. If only slight alterations are made, then only the saturation is increased or decreased. Go beyond a certain threshold and the hue alters as well. That’s the colour balance. That’s why labs are reluctant to push or pull colour films very much. So, using the same lab to process colour films is a good idea. You may be surprised how much variation there can be between labs.
Once a series of exposures of the colour patch chart and greyscale have been made and the film processed you can then assess colour balance and overall contrast. The colour balance can drift more than just perceptibly because of batch-to-batch variations in the film, differences in the processing especially with the first development and the colour temperature of the exposing light. This is why I and many other photograpers buy 30 or more rolls or 50 sheet boxes of film at a time. It saves testing for speed and colour balance as frequently.
To assess the colour balance you will need to choose an optimally exposed image. Generally, if only the last step in the greyscale is clear film and there is a distinct black or D-Max that looks the same as the film rebate and overall, it doesn’t look a bit too dark or light then it probably looks good on the light box. However, determining the best colour balance is best done by plotting the tone curve from the greyscale with a colour transmission densitometer. People who don’t have access to a densitometer can still access colour balance by eye using print viewing filters and comparing the result directly with the colour patch and greyscale. Use a daylight balanced light box and viewing light for this. With colour negatives it is a lot less critical. This is because a negative can be quite out of balance, but you can’t compare it directly with the target subject. It has to be printed. This allows a negative to be beaten into submission by dialing in large amounts of filtration, dodging and burning in. That orange/brown colour which is the integral colour corrective mask helps in this regard as well.
There are two types of colour bias you can encounter with colour films. The global and proportional. The global usually comes from exposing a daylight balanced film to a light source with a colour temperature above or below the required 5000 deg K to 5500 deg K. Discontinuous spectrums that have a low colour rendering index or CRI are notorious for producing global colour biases. A colour temperature meter is a great help in this regard. Most of them will give a readout in mired values and the filter pack required. The proportional colour bias is what your checking for with the densitometer and it usually affects the areas of the image based on the exposure they receive. For example, blacks or those values near it won’t show any colour bias at all. For the same reason neither will the upper highlights. But the important mid-tones where the majority of the information falls will.
Look at the image through a set of colour balancing filters or select the filter pack from the plotted curves and that will become the standard colour corrective filter pack for that batch of film when exposed that way. Change anything including the meter, film type or processing then retesting may be required. I might add if you are using a print viewing filter set based on the Wratten system for every 10CC units (short for colour corrective) of any colour just shift the decimal point two spaces to the left and you finish up with 0.1 This is the number of log units of opacity needed for exposure correction. Every 0.1 log units equates to one third of a stop.
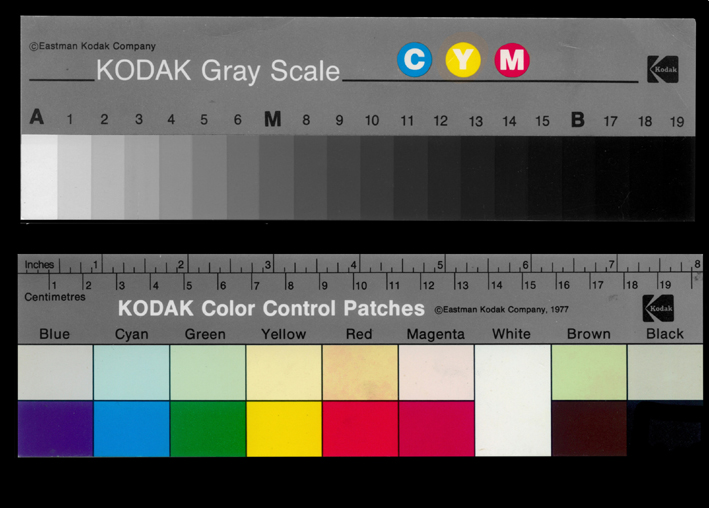
Image #1 is the final test result for the current batch of Kodak Ektachrome 120 I am using. It was the final result after the speed point was found and filter pack determined. The labs try to maintain the chemistry to the Z manual standards laid out by Kodak for their films. It varies depending on whether dip and dunk, rotary or some other mechanized processing is used. Small tanks like those used by home processing is rarely used in a commercial replenishing system.
A lot of photographers are trying their hand at home processing E6 films judging by the number of kits being sold. Probably due to the fact that the turnaround times can be quite long. Not all labs will do an E6 run every day and often wait until they have enough film to make it profitable. Postage if you can’t drop it off and collect it increases the delay. But often the results from home processing see photographers return to the labs and there are good reasons they only try it a few times.
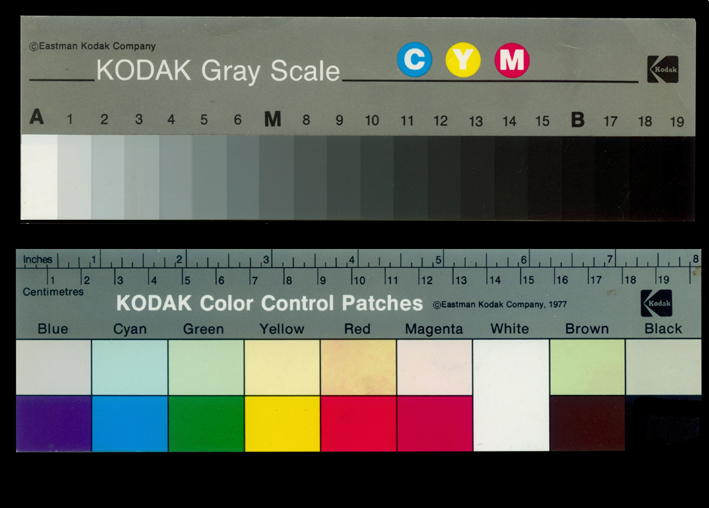
Controlling the temperature of the solutions, particularly the two developers, to within + or – two tenths of a degree for the duration of the processing times is tricky. However, most of the time third party kits are used rather than the genuine Kodak E6 or Fuji CR-56 chemicals. The E6 and CR-56 are priority formulas and are not shared with other companies. I have tested and plotted the differences from clip tests from the same roll of Ektachrome in several kits, different labs and mixing the chemistry myself from scratch. They all varied from the genuine Kodak chemistry by a little to a lot.
Most people find the real issues begin when they buy an E6 kit mix it up in accordance with the instructions and maintain the temperatures as closely as they can. The end results vary from what went wrong to its Ok I can live with that. Even when I have seen results that a person is pleased with I am glad I didn’t have to present the images to the printers.
Here is what I have found out about third party kits. Even when mixed up exactly, the solutions probably won’t measure up to the specific gravity or SG and the pH or acidity, or alkalinity specified by the process manuals printed by the film manufacturers. They are only E6 compatible kits and to get the best results I usually need to tweak them to meet the film manufacturers specifications. To do this you will need to invest in a SG and pH meter. Both of these will need to be calibrated before use. It is also better to pay a bit extra and get a pH meter with ATC or auto temperature compensation for reasons I won’t elaborate on here.
Although some chemists disagree, I mix my E6 chemicals up on distilled water. It just eliminates another possible variable. According to Kodaks E6 data sheet the first developer should be maintained at a pH of no less than 9.60 and no higher than 10.0 The first developer should maintain a SG1.051 to 1.055 at 38 deg C.
The pH of the colour developer is more critical and should be maintained at 11.1 with only slight shifts of minus 0.2 to plus 0.7 causing colour shifts. Too low induces yellow to green colour shift #2 while too high causes a magenta colour shift. Image #3 The SG of the colour developer should be maintained between 1.037 to 1.043
The big question is what you can do to fine tune the pH and SG if they are off. If the SG is too high simply add water. You won’t have to add much to change the SG by 0.1 If it is too low simply add more of the components to the solution. Before you ask how do I get my full amount from the kit if I do that. Simply put you don’t. You generally don’t have to add very much.
If the pH of the colour developer or the first developer is a little low I just add a few ml of a 10% solution of sodium hydroxide. If it is a little high, I just add a few ml of exhausted developer to it. Which is why I never throw out all the used first or colour developer. In any case you don’t have to alter the SG or pH of either developer to run into problems when they drift from the film manufacturers manuals. But it doesn’t take a lot to correct them either.
There are a couple of pieces of equipment that will make life easier in the darkroom regardless of whether you are processing colour or B&W. One such item is a temperature-controlled water mixing device. They have been around for a long time but the one I have used since 1982 is the intellifaucet. A computer-controlled device that can control the water temperatures to within + or – 0.1 degC. The other is a compensating developing timer. At one time the only company having these made was Zone Vl studios in Vermont. These days there are various makes and models there are even apps for your smart phone that come with a probe.
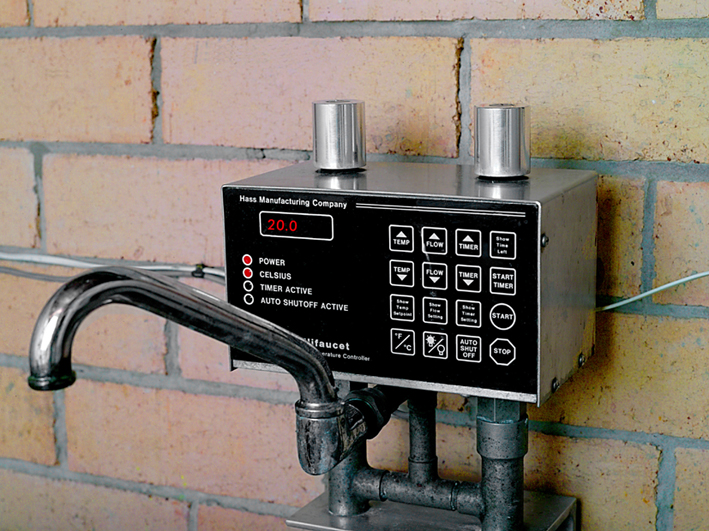
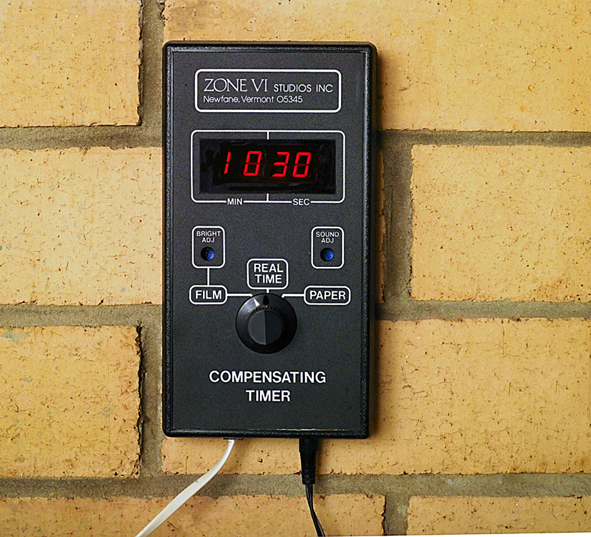
I consider these two items essential when making colour separations negatives when printing in dye transfer and carbon but once you have them, you’ll wonder how you did without them even for gelatin silver printing..
Finally, there is mixing E6 chemistry up from scratch from dry constituents. Something I used to do when compounds like CD-4 were relatively cheap and you could buy small quantities of them. Although you can still buy all the necessary chemicals it often works out nearly the same price as a kit. The CD-4 even in dry granules have a fairly short shelf life. But a lot of testing and tuning is involved to do this and you will need a colour densitometer. I opted for buying the Kodak chemical kits in a quantity that labs normally buy. Although the manufacturers don’t recommend you do this placing the bottles in the freezer has worked for me for many years. Just allow them to thaw out completely and don’t be tempted to speed up the process by using a microwave. However if you want to explore the process of mixing the chemistry from scratch there are a couple books I would recommend you read before wading in hip deep. Simplified Colour Processing Formulas by Patrick D Dignan and Colour Chemistry books of which there are several by Robert M Christie.
Having written all this I have to admit I still use labs occasionally. This is when the turnaround time isn’t important and there may only be one or two rolls. But when I need the results next or same day or the images are precious because they simply cannot be reshot then I take control. Even for B&W photographers it can be a valuable tool to have. I hope those interested in shooting colour transparency film find this information useful. It’s taken me many years to fine tune this part of the workflow and I know it works well.