Darkroom – Enrico Scotece
The darkroom, a special place of wonder, creation, alchemy, and sometimes great frustration. A couple of decades ago I decided that the darkroom will be my practice, and this was in the face of the all-electro-pixel ‘threat’ that was changing what the masses used to make pictures. To see the use of film thrive nowadays is brilliant, and the increasing interest in darkroom practice is as equally important to note, and nurture.
After running commercial studios and community darkrooms for a decade and a half, it was time to be greedy and build a darkroom for myself. A move away from the city 10 years ago to the upper Blue Mountains of NSW allowed me to rethink a few priorities. The mountains and wilderness is where my heart is, and in a literal sense, it is where much of my practice resides. On the flipside, I photograph much of the remote outback as a contrast to the dense mountain landscape I’m so familiar with. My main practice is b+w fibre base photographs. I produce photographs using a very large collection of vintage stock, some up to 80 years old, through to various contemporary fibre base papers, and recently I have embarked upon salt printing, the first paper-based photographic process for making positive images on paper. Yes, I love paper! As a substrate, the possibilities are endless.
The recent darkroom build started as a patch of dirt. With 20sqm to play with it had to be well planned, from a workflow perspective through to a “where do I put all this stuff?” task and, with that in mind, I was sure to keep the structure’s dimensions within about 5mm shy of a DA approval. It was quite simple to plan given it is not the first darkroom build, however, space constraint was always going to be an issue. The location is alongside an existing workshop, and a future 28sqm print press and photography studio. At least I could keep this build all ‘darkroom’ as all the post-production workflow can be done in the adjoining dwellings.

As per all darkrooms, I set some basic rules; a split air-con system, adequate fresh air-flow, exhausts, more power-points than you actually need, and space to move. I don’t mind a darkroom being full of all the necessities, so long as clutter is done away with, and the floor remains clear of hazards.
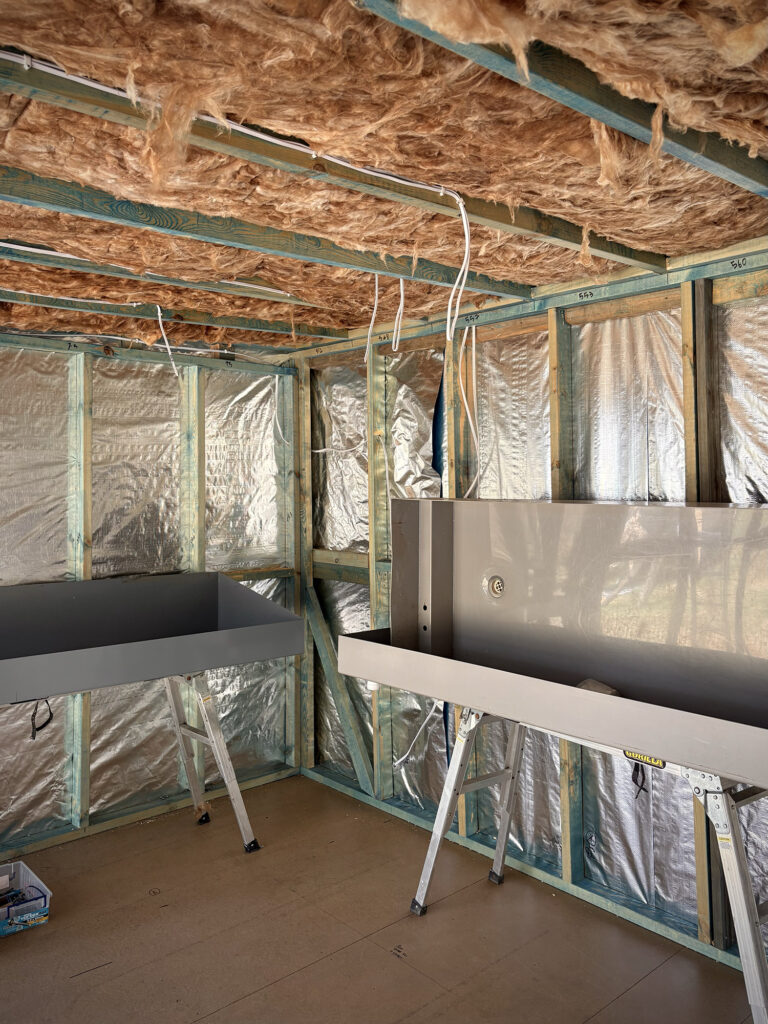
The floor and foundation piers are of a steel construction that sit well above ground. This encourages adequate airflow beneath the structure, and with added floor insulation it prevents moisture build up. As I invested in a new tin roof for the house to accommodate a solar system to service the whole property, the old corrugated iron roof panels repurposed as the darkroom’s exterior wall cladding. The internal wall and roof/ceiling structure are timber, both fully insulated, beneath tin.
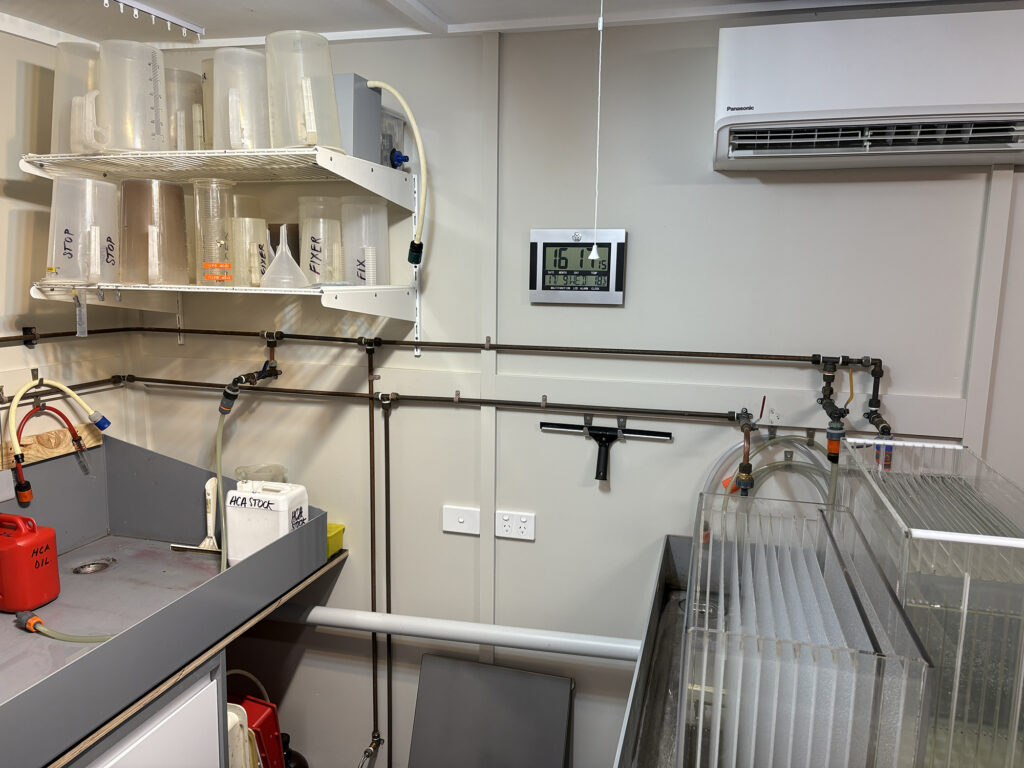
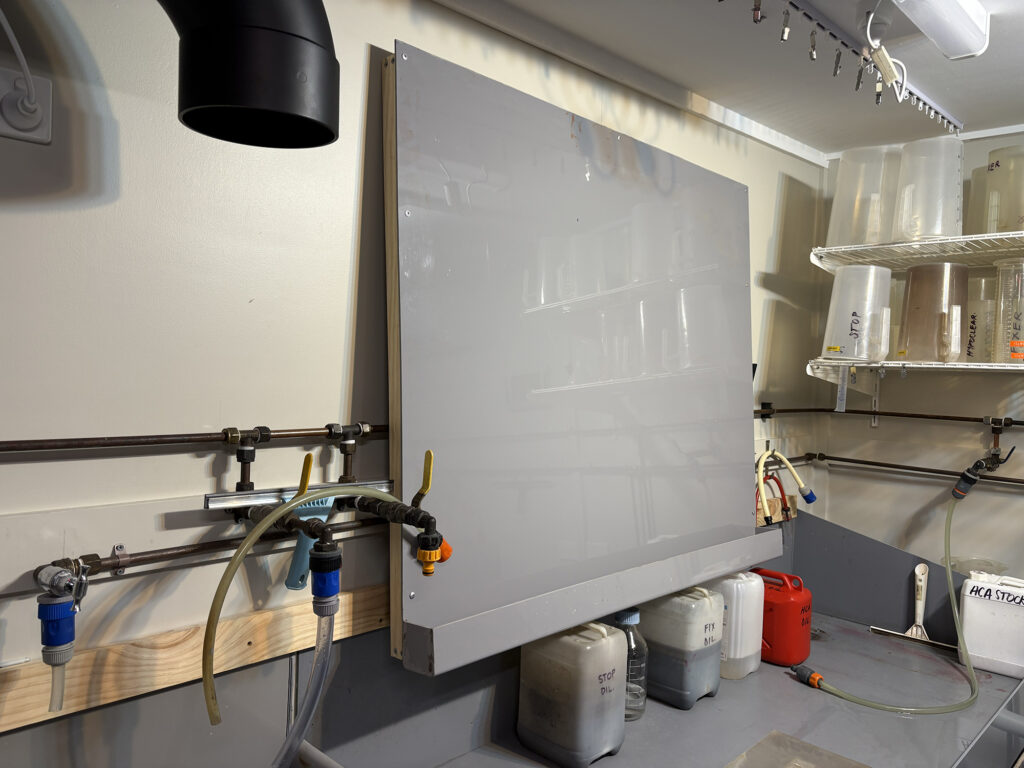
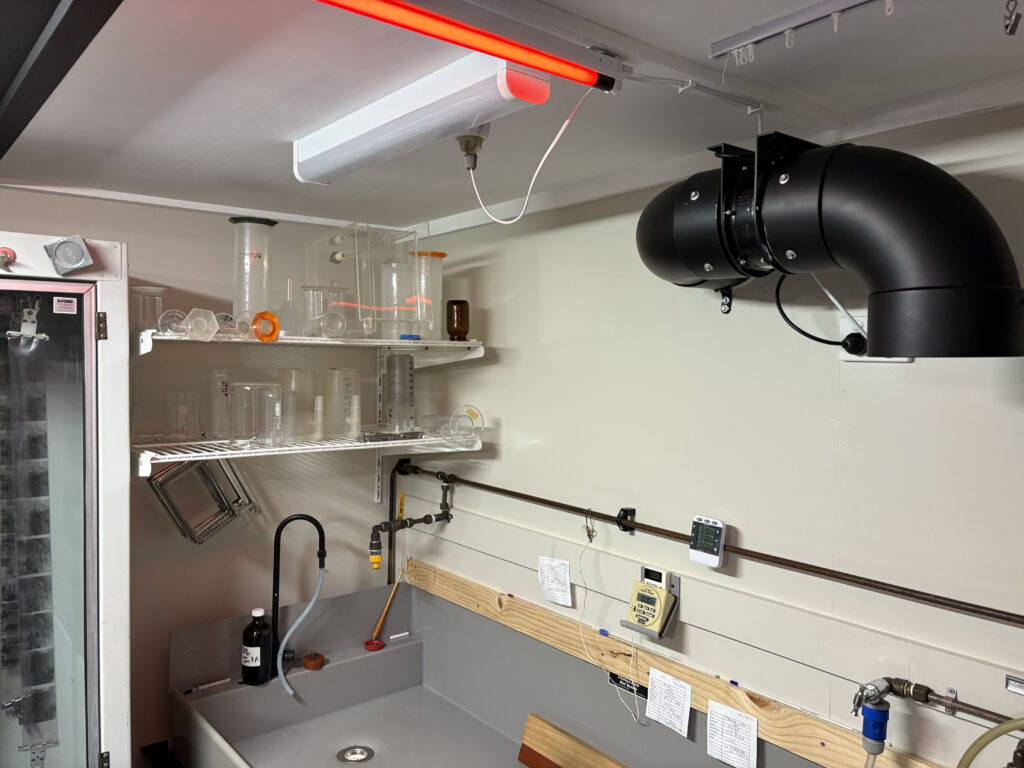
Working with the ‘wet-side’ / ‘dry-side’ model in mind I tried to make sense of the layout of the working area. The only change from previous darkrooms was that my viewing area was in an adjoining separate ‘light’ room however this time it had to be embedded within. The viewing panel is a permanent fixture that sits above one of the three sinks. I have two sinks that span a 3.9 metre wall (the long sink), with an added parallel 2 metre sink (the short sink) that protrudes through the centre of the room. The long sink is the main processing and print development area, whereas the short sink houses two 16×20 inch archival print washers, as well as a smaller 12×16 vessel. The print drying rack is situated beneath it, alongside the tray storage area.
The main sink has wall mounted drying racks at either end, and between the main sink and the first enlarger bench sits the film dryer. Beneath are cupboards that provide adequate storage for all the chemicals (raw, powdered, and commercial liquid stock), along with other associated paraphernalia. This includes a chemical stirrer, weight scales, scientific plastic and glassware with all the other usual equipment you’d expect to find. A large bin and of course more tray storage also sit alongside the cupboards. It is bizarre how many trays I own and use. I always want to scale the quantity back but I somehow end up with the same lot or more anyhow!
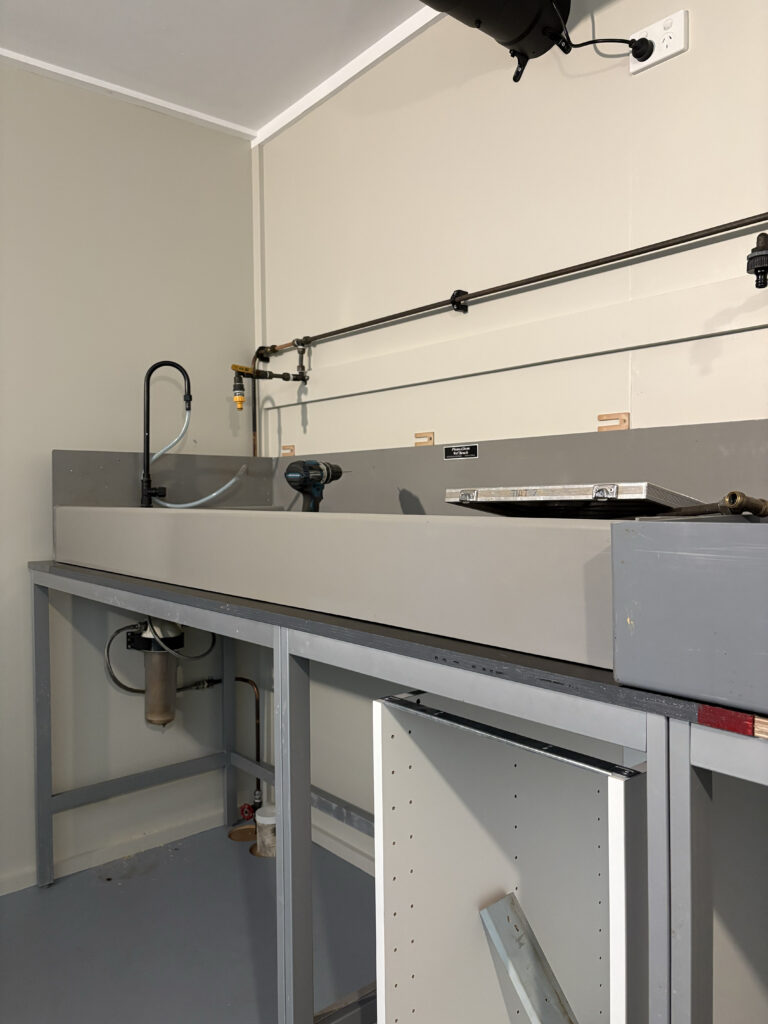
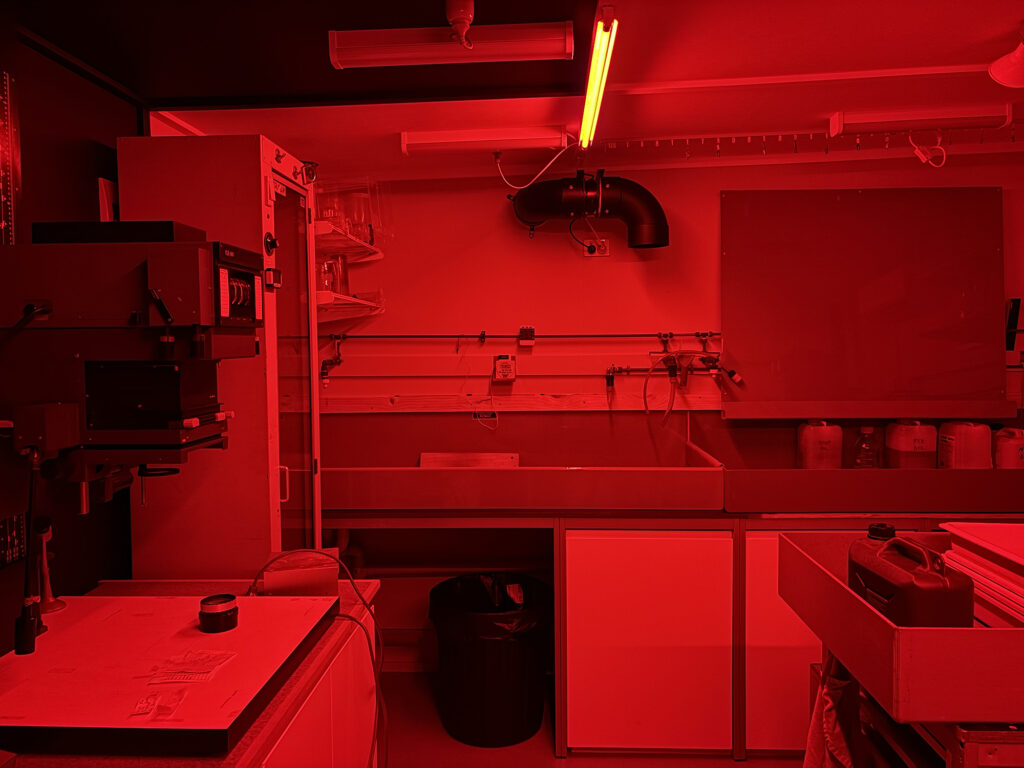
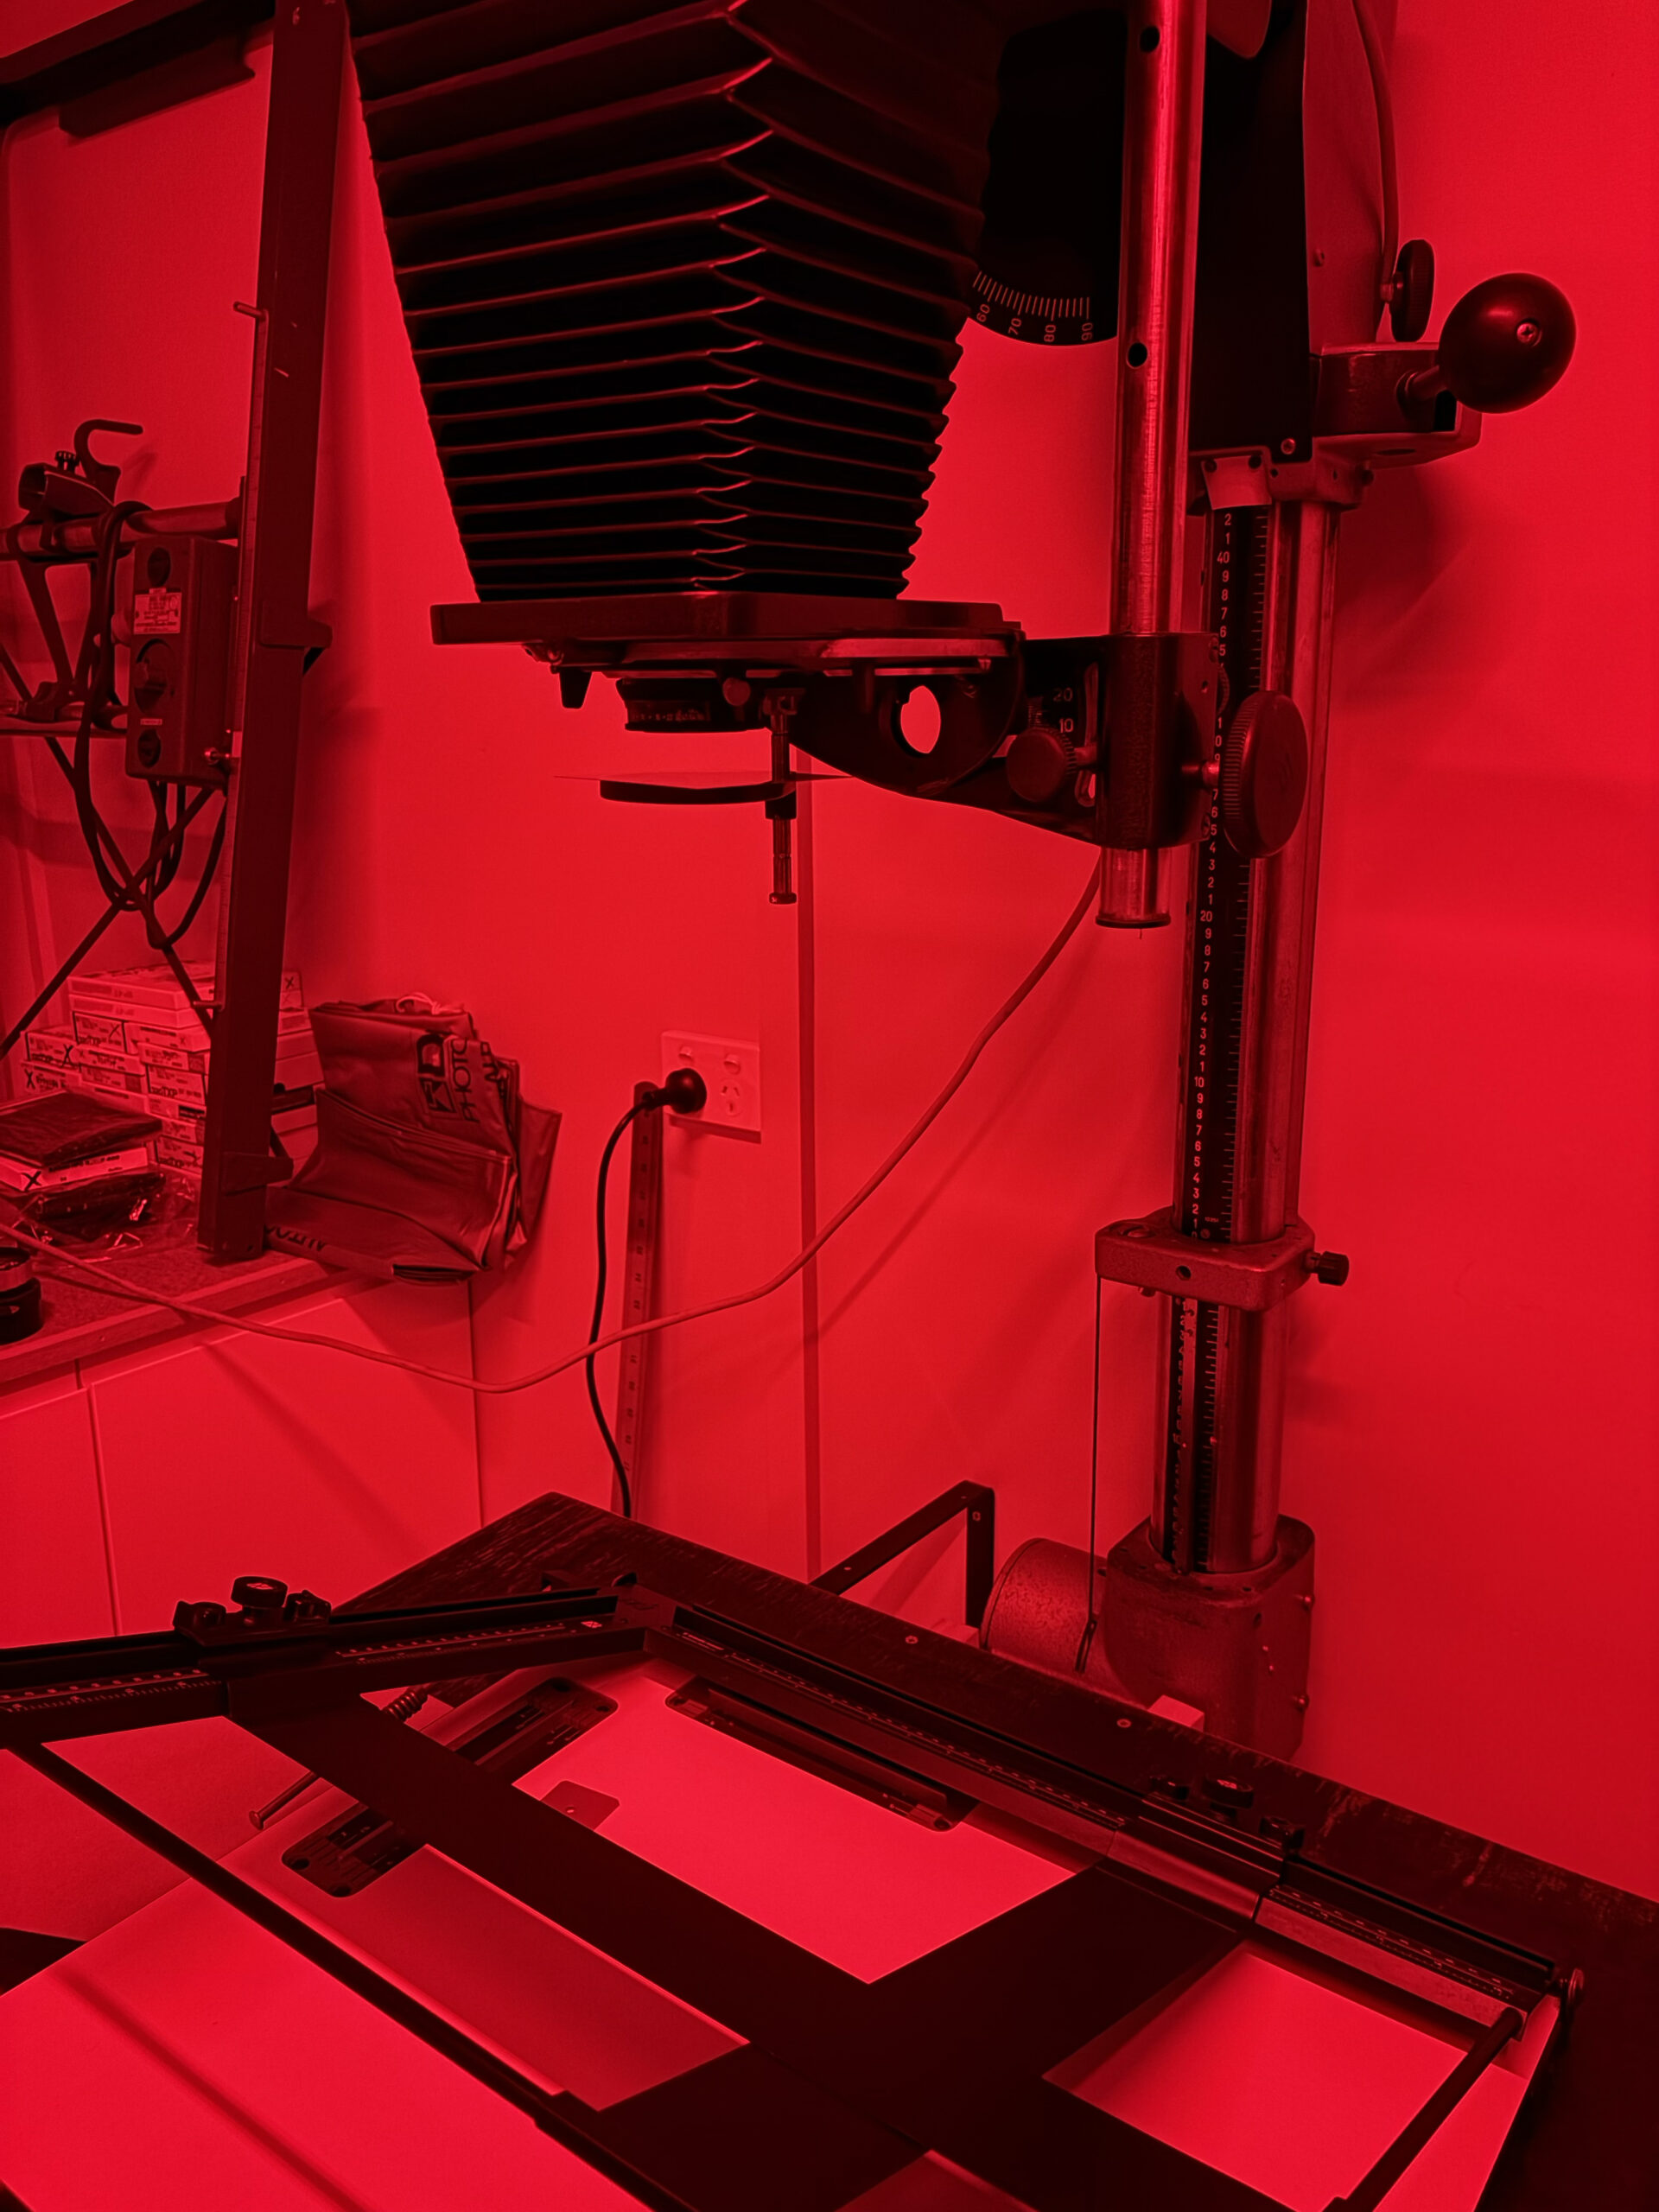
Two separate benches accommodate the enlargers. I have three Durst Laborator 1200 4×5 enlargers. I usually have them set up for 35mm, 120, and 4×5 formats. It just depends on what I’m working on at any given time. These are all diffusion colour-head enlargers which is my preference for making b+w photographs. The fourth enlarger is a Durst 138 5×7 condenser enlarger, my only option to enlarge my 5×7 inch negatives. The beauty of this enlarger is that it will also accept the half-plate format and other odd sizes. There are two main enlarger timers I use. One is a percentage timer. It is a Durst product, the only one of its kind that I’ve ever seen. I purchased it with one of the 4×5 enlargers when Durst announced they were ceasing production of darkroom equipment. I wish I could source another! The other timer is a Nocon F-Stop timer. Both are a joy to use, though ultimately, having a patient eye is key.
The UV exposure unit lives alongside one of the 4×5 enlargers. The exposure unit can accommodate an 11×14 contact frame (used for 8×10 and 5×7 contact photographs), and it’s primary use is for making salt prints.
For some applications I use a Saunders 11×14 four-blade easel, though my go-to are a bunch of RRB (or Photon Beard) two-blade easels. These have never let me down. I made sure that all easels are accessible and shelved separately within cupboard space for easy access. All other cupboard space houses every other necessity including neg sleeves, enlarger accessories, film drying clips, printing filters, film canister openers, spare bulbs, lenses, processing tanks, focus scopes, notes, processing data… the list goes on. Most importantly, one cupboard space houses an amplifier and CD player with a couple of studio monitors on the bench for a decent sound. A must for me.
I always keep sink plumbing external to the wall. This way I can add a tap quite easily if needed. A ‘hot’ tap is a must for where I live, just to keep things to temperature. The hot water tank is situated outside the darkroom with an on/off switch inside, near the sink. The darkroom hot water tank is not always ‘on’ heating constantly… I just switch it on and off with ease from inside the darkroom. Essentially, I use it as a big 50L kettle that only stays on when I’m in the darkroom. If I need boiling water, I just use the darkroom kettle.
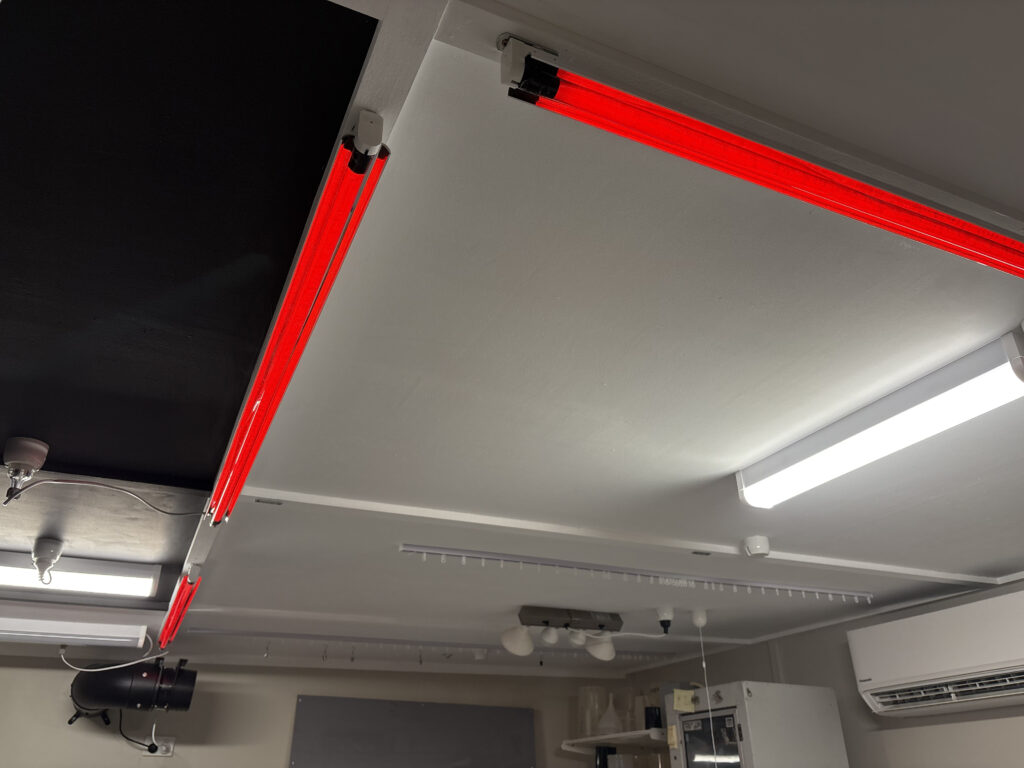
I hate a dim darkroom. It is unnecessary and horrible. However, sometimes I need the darkroom dim because of various materials I may be using, especially vintage film, plates, or paper. I have three light circuits (white light, safe light, viewing light), and the lights plug into ceiling mounted power sockets. If I want a section of the darkroom to be more dim then I simply unplug a particular light. The safe lights are red flouro, and the base of the fittings are magnetic. This allows for moving the lights when/if required with ease, to various metal plates situated on the ceiling.
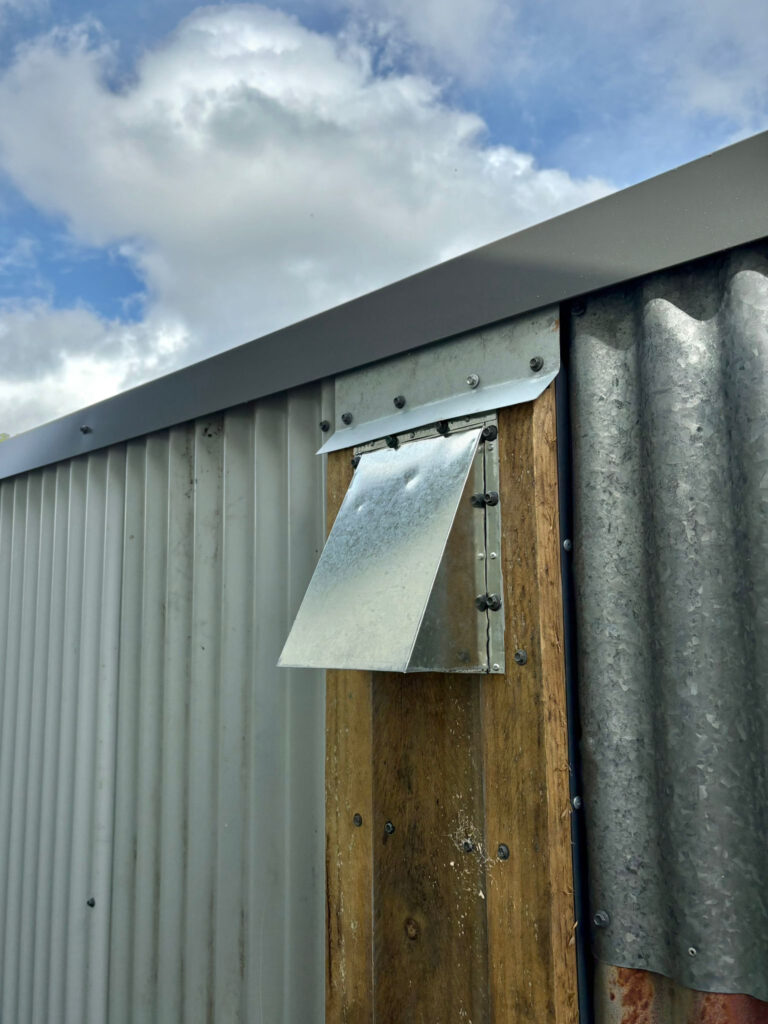
The darkroom door is painted Kodak yellow. It was either that or Agfa red. I will at some stage get around to painting the awning and the door frame. I’ve given the darkroom a test run on a few occasions for printing, after I processed a massive back log of film. One last thing is to add another air intake and then I’m done. After that I will begin a studio build project that will house finishing areas, a print press, etching press, the plan drawers, the book collection/library… Watch this space!